Decorated box for knitting needles

Something unusual is about to happen. I’m going to make a post that contains something other than a card! It’s been so long since that happened that I don’t even remember when it was.. However, what time other than right before Christmas is the perfect time to suggest what to make as a gift?

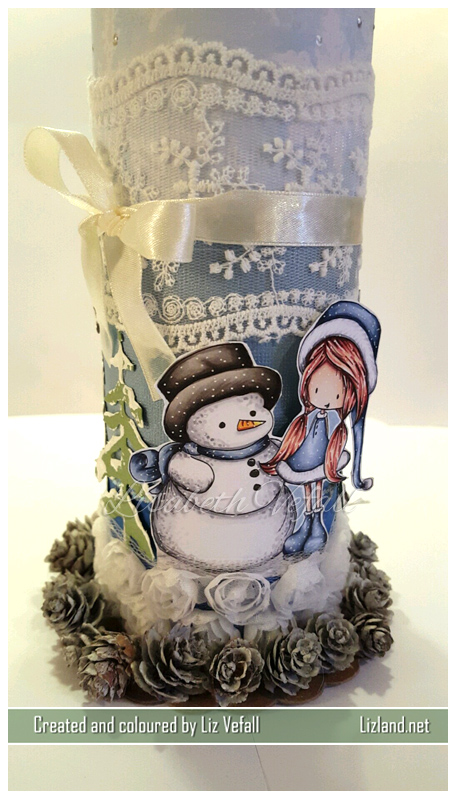
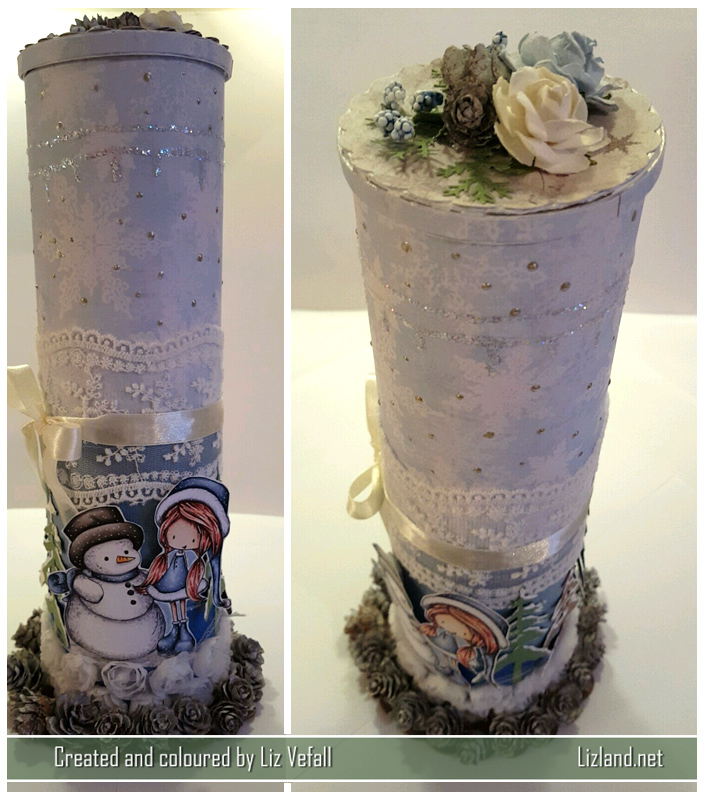
I have this great co-worker who knitted me some mittens, two pairs and gave me have a third to be exact (spoilt much? :D), so I wanted to make something in return, in addition to a card. I decided on making something she could have her knitting needles in. The choice fell on a pringles can. Before I started decorating it, I painted the whole can with a coat of white acrylic paint so the print wouldn’t accidentally end up showing through…

I cut the length I wanted on two different coloured papers and then measured around the box before cutting it to fit. Then I measured the remaining space before I cut the third piece. I used the same measurements for around the can for the various ribbons and lace. The ribbons and lace are from Wild Orhic Crafts, Live and Love Crafts and a local shop, as are the flowers on top of the can.

The image I decided to colour up is by Tiddly Inks, clearly one of my favourite images for this time of year. I chose it as it doesn’t have to be for Christmas, but still gives a wintery feeling. It is coloured up with Copics.

All around the bottom bit I have glued on small pine cones, and around the can from one end of the cut out coloured image to another I have added die cut trees that I have painted with white acrylic paint, at the back there is also a die cut deer. All the die cuts are made with Noor Design dies.

This project is also featured on the 20th of December at Copic Marker Norge as part of our advent inspiration. I suggest you go take a look at what the design team girls have come up with to inspire you for the holiday.

I have used the following copics for this: (skin)E000, E00, E04, E11, (hair) E08, E18, E19, E49, E97, (snow) C1, C3, C5, (clothes) B91, B93, B95, B97, B99, (hat) W1, W3, W5, W7, 100

#tiddlyspiration

Here it is: my final post for the Tiddly Inks Design Team. The post is a week late because I have spent the entire start of the year with a nasty cold that seems to finally loosen its grip on me! Anyway, my tiddly term is up, unfortunately. I have absolutely loved working with this images and my pile of favourites has grown a whole lot bigger! One thing is definitely not over, though, and that is my love for colouring up these images, so you most certainly haven’t seen the last of my tiddly makes! As it is a new year, we are not doing a normal themed challenge, however there is a challenge! See the title of my post? You got it! Tag your creation in your blog or on Facebook, Instagram etc with #tiddlyspiration for your chance to win a fab prize! It’s so easy! See the challenge blog for more details.

My card for this post is one I recently made for a friend who got married right before new years. Congratulations, hun! I wish you both all the best!

Of course it also had to have a box to go with and Love You Mostest Couple is the best stamp as it didn’t only have the most adorable bride and groom, but it also has a lovely floral heart which was perfect for my box. I coloured it all in with copics and had a lot of fun (read struggled..) with the hair!

GoKreate dies were used for the shape of the card and I used Noor Design dies for the butterflies and the box is also from there. The lace and pearls are from Live and Love Crafts whereas the ribbon was bought at Range in the UK and doesn’t seem to have a brand name on it.. How odd. Anyway, I used loads of flowers from Wild Orchid Crafts, distressed all the edges and added some frantage!

card403_1

card403_2

Pepper grinder

There has been far too many pink cards as of late, hasn’t it? Time to mix it up with another colour. Blue, green and brown for a change. I made this card on order a couple of months ago.

The paper is from Pion, the flowers are from Wild Orchid Crafts, the ribbon is from The Hobby House. I have used a Martha Stewart puncher for the leaves and spellbinder dies for the ovals. I don’t remember where the rhinestones are from…

card231_1

I also made a matching box for the card, but I decided to make it more blue than green. As I used blue flowers on the card, I decided on white and green ones for the box. I only decorated the lid of the box. Here it is:

card231_2

Baby card + box

One exam done and two to go; all this week. I am so looking forward to the weekend right now! Although I’ve barely done anything but study the past few weeks, another card post was well due! This card and box were the last I made before I packed it all away for the exam preparations. The card was a request from a co-worker and I suggested to make a box to go with. This is the first time I’ve attempted making a box! Let’s have a look then!

Continue reading “Baby card + box”