Wryn Wishes for hugs

It is Friday! Yey! The snow is finally nearly gone and we have decent spring weather and it has gotten reasonably warm rather quickly. I am loving it! Spent so much time outside this week!

Today it’s time to snow you another Tiddly Inks card, for Fab Friday! For this card I’ve used the lovely image Wryn Wishes. I’ve used a border die from La-La Land Crafts, leaves are from a Precious Marieke die and the hearts are from Memory Box. The hugs is a chipboard from Make it Crafty and I’ve used Maja Design paper. Around the image I’ve used a swirly leaf die from Noor Design and the flowers are from Wild Orchid Crafts.

Copics used: (hair) E08, E18, E19, E97, (skin) E00, E02, E04, E13, E15, (dress) V000, V91, V93, V95, (flower and dragonflies) W0, W3, Y11, Y19, R20, R22, YG13, YG67

Wryn fairy

Did you see the new release over at Tiddly Inks? There are so many cute ones and they have even got a few brand new clear stamps! Yey!

One of my favourites from this new release is the little fairy! The image is called Magical Day. I decided to doodle a bit on this one and gave her a striped top so she looks a little like a bee fairy! I also embossed the wings with gold glitter and white after colouring them yellow to make them sparkle.

It’s not a big surprise anymore than this is yet another CAS card. I made the background with a Tim Holtz stencil, some distress oxide inks and gold embossing powder. The butterfly is also coloured with distress oxide and cut out with a Precious Marieke die. I printed the words “my friend” onto the card base and then embossed a Little Birdie text stamp in white.

8. Friendship

Another colouringless card today for day eight. The main focal point of the card is a text stamp from Papirdesign that I was so lucky to win on Elin‘s blog. It is a lovely text about friendship.

I have used various papers, I think they may be Pion this time, to which I have added white acrylic paint. I really do love that effect. The lace I got at Live and Love Craft, the flowers are from Wild Orchid Crafts and The Hobby House and I have used dies from Memory Box and Precious Marieke.

Tall cake

I’ve been enjoying colouring up images by Mo’s Digital Pencil the past couple of weeks. This tall cake one I bought specifically to use for a couple of birthday cards I had coming up. Isn’t she the best?!

For the cake my sister insisted I needed to have some glitter. I used mostly transparent glitter, but with a bace layer of R00 and R12. As you can see from the colour list below, you don’t need to use a lot of Copics to colour up a pretty image and make it into a card. This time I stuck with just 2 colours for most of it, sometimes 3 if I was colouring up bigger areas. It was fun colouring up a lighter image again after the very bright contrast ones I’ve done in the past few blog posts!

I’ve used a fair few dies on this card: butterfly and leaf die by Precious Marieke, border die by La-La Land, alphabet die by Kaboks and gratulerer by Papirdesign. The flowers are as usual by Wild Orchid Crafts. And I used a bit of white acrylic paint around the edges of most elements.

Copics used: (skin) E000, E00, E04, E11, (hair) E25, E29, E31, (clothes) W1, W3, YG01, YG03, YG67, (cake) E41, E43, R00, R12, Y13, YG16, (plate) C1, C3

Best of the bunch

It is such a beautiful day today. All the various colours of autumn being highlighted by the sunshine and bright blue sky. A perfect day for a walk in the forest or around the lake. I have yet to decide which it will be!

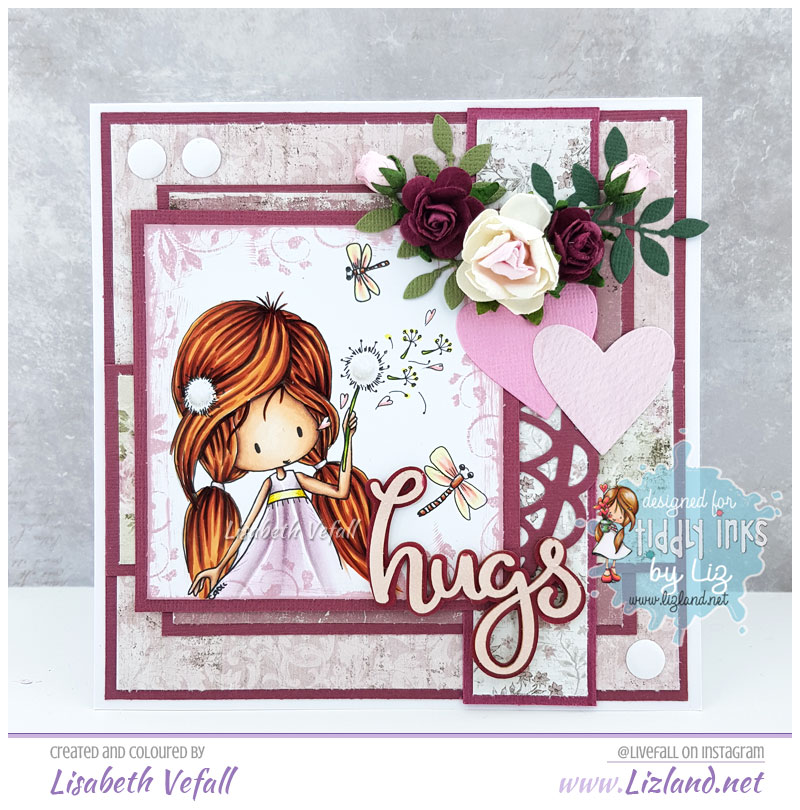
Today I am showcasing a card using Mo Manning’s Best of the Bunch. It is totally adorable and I am certain it will appear on the blog more than once! I had a lot of fun colouring it up and I am quite pleased how it turned out. I’ve used paper from Papermania, flowers from Wild Orchid Crafts and dies from Precious Marieke and Papirdesign.

The dog was coloured mostly using flicks and then some harder shadows on his belly, bum and on his face.  The lighter the colour, the longer flicks I made, and did this both on the brown and grey parts of the fur. I kept most of it white as I wanted contrasts.

On the bench I’ve added a lot of smaller dots. This is to make it look like a stone bench. The dots were all random, but I tried to keep them situated somewhat like the original image even if I added a lot more of it. The majority of the darker dots are close to the edge and on the darker solid colour. Then the lighter dots are on the lighter colour. Again I tried to keep a lot of contrast.

The ground has also been made with many dots, although these are smaller than the bench to make it look like gravel.

Finally a tip: always colour the colour red as the last colour of your project. I find that red will easily bleed into other colours if I colour red first and get another, lighter, colour close to the red. It is terribly frustrating when you are pleased with your image and just added the final few bits and you get close to the red and want to just pull your hair out and never colour again… If you just use the red markers at the end of your project, you can usually avoid such unfortunate mishaps!

Here is, as usual, a different view of the card. You can see both the bench and the gravel quite well on this.

Copics used: (skin) E000, E00, E04, E11, (hair) E25, E27, E31, E34, E49, (bench) W2, W3, W5, W7, W9, (gravel) C3, C5, C7, C9, (red) R22, R24, R27, R29, R59, (outfit) E41, E43, E44, E47, E49, (leaves) YG03, YG67, (simple blue background) B000