LotV a time for giving

Christmas is coming up fast. It feels particularly fast when you have so much to do you’ve barely even got time to think about Christmas… Less than a month left now and I have a fair few colourings I still want to make cards of before then.

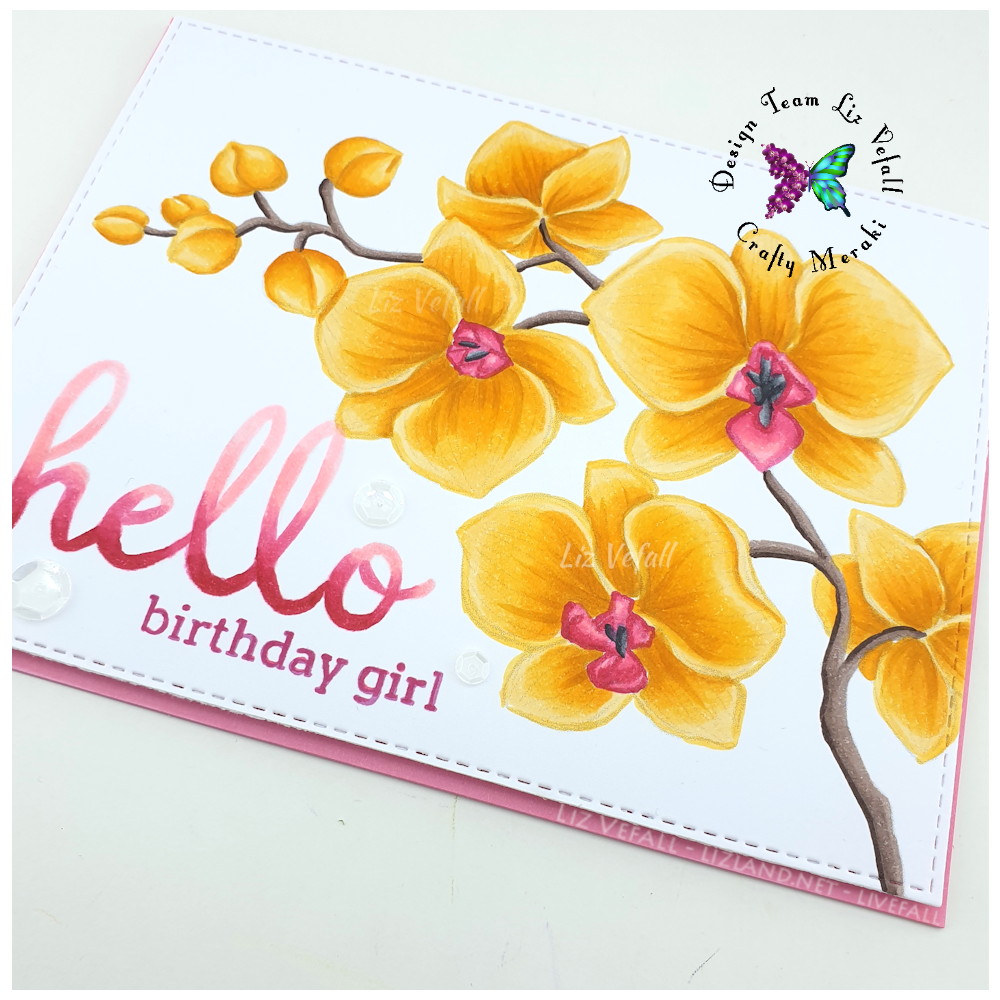
Here I’ve coloured up one of the Lili of the Valley stamps that was released earlier this year. I think it is one of my favourites from this year!

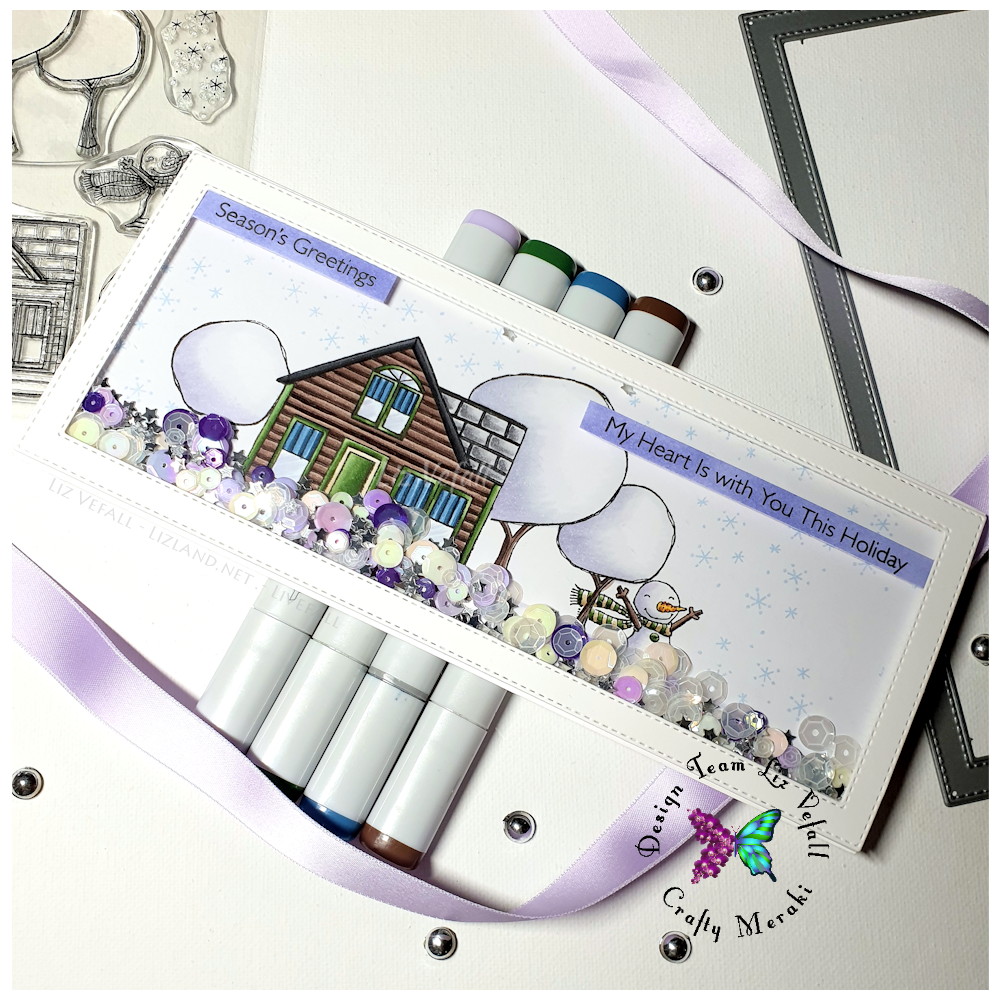
The card itself is simple with a small cluster of die cut paper scraps, a doily, some enamel dots and a sentiment. The papers are mostly by Maja Design and the sentiment stamp is by Mama Elephant.

Crafty Meraki shaker card

It’s Tuesday and time for another Crafty Meraki project. I’ve made another shaker card this week and this time I’ve used the full bigger frame from Frame Worthy slimline dies set. The stamps I decided to use this time is from the Flurry of Love set by My Favorite Things, and I made it with a subtle purple as the main colour. I’ve used nearly all the stamps from said set and masked them together. Then I used the frame to make the shaker area filling it with various sequins in matching colours before adding two sentiments on top.

Here is another photo where the shaker elements aren’t covering the whole image

Copics used: C0, C2, BV0000, BV02, B91, B95, B97, B99, E41, E42, E43, E71, E74, E77, E79, YG61, YG63, YG67, BG99, N1, N3, N5, N7, N9, Y35, Y38, E07

RAM Christmas Sled

It is time for another DT project for Rachelle Anne Miller Creative Studios. This time I have used the stamp Christmas Sled. It is such a cute little stamp! I printed it towards the bottom of the page because I wanted to give making my own background for it a go…

I’ve been looking at and admiring Sandy Allnock’s awesome colouring for a while and I’ve seen a card that inspired me to try to make my own background. I don’t have a lot of time, so I never have time to actually watch videos and such, so I decided to give it a go on my own and see if I could make something of the sorts. And I did! I’m happy with how it turned out, and I know I need a fair bit more practice, but it was fun and not at all as difficult as I had expected it to be!

I have to say I am a bit surprised how funny the transparent sequins look in the photo, but at least they look pretty cool on the card itself! The sentiment is from a collaboration between Mama Elephant and Simon Says Stamp, and I used Altenew ink on it.

The Copic colours will be added sometime tomorrow, so check back then if you’re curious!

Crafty Meraki Butterfly orchid

It is Tuesday again so that means it’s time for another Crafty Meraki project. The project I have made for today is actually a shaker card! I don’t tend to make many of those, but with the great Frame Worthy slimline dies I simply couldn’t help myself. I coloured up a no-line version of the Meraki butterfly and cut it out by hand. Then I used two of the frame dies and cut them to the length I wanted before filling it with sequins in colours matching the butterfly. An embossed MFT Stamps (Bitty Bears) sentiment on matching cardstock with a few enamel dots by Altenew finished it all off nicely.

Here is a photo of it laying down flat.

Copics used: BG11, BG13, BG15, BG18, BG78, RV00, RV02, RV52, RV55, RV66, RV69, N3, N5, N7, N9, G94, G99

Crafty Meraki yellow orchid

It is Tuesday and that means it’s my turn to be up on the Crafty Meraki blog. I have decided to use one of the collaboration stamps from the latest release; the orchid stamp in collaboration with Colorado Craft Company. This is one of my favourite floral stamps at the moment.

As winter is approaching quickly in my corner of the world, I decided one some bright, cheerful, summery colours. I don’t tend to use a lot of yellow, and this card is filled with it! A bit of bright pink to go with seemed perfect. I have used sentiments from Pinkfresh Studio to go with.

I decided to try something a little bit different this time and instead of stamping up the sentiment normally, I stamped the word hello in InkOn3’s fadeout ink and then I coloured it in using the same Copic markers I’d picked for the centre of the flower. It is something I haven’t tried much before, but I think it gave the text a cool gradient/ombre effect.

And here is a final photo of the card.

Copics used: Y32, Y35, Y38, YR24, RV21, RV23, RV25, RV29, E71, E74, E79, N3, N5, N7