MFT Coloring virtuoso

My second entry for this years MFT Stamps‘ Superstar contest is for the colouring category. I’ve been unsure if I was going to have the energy for this as I’ve been unwell most of this month so far, the past week and a half with a nasty cold and a cough that simply will neither let go nor let me sleep. Oh how I am looking forward to it disappearing!

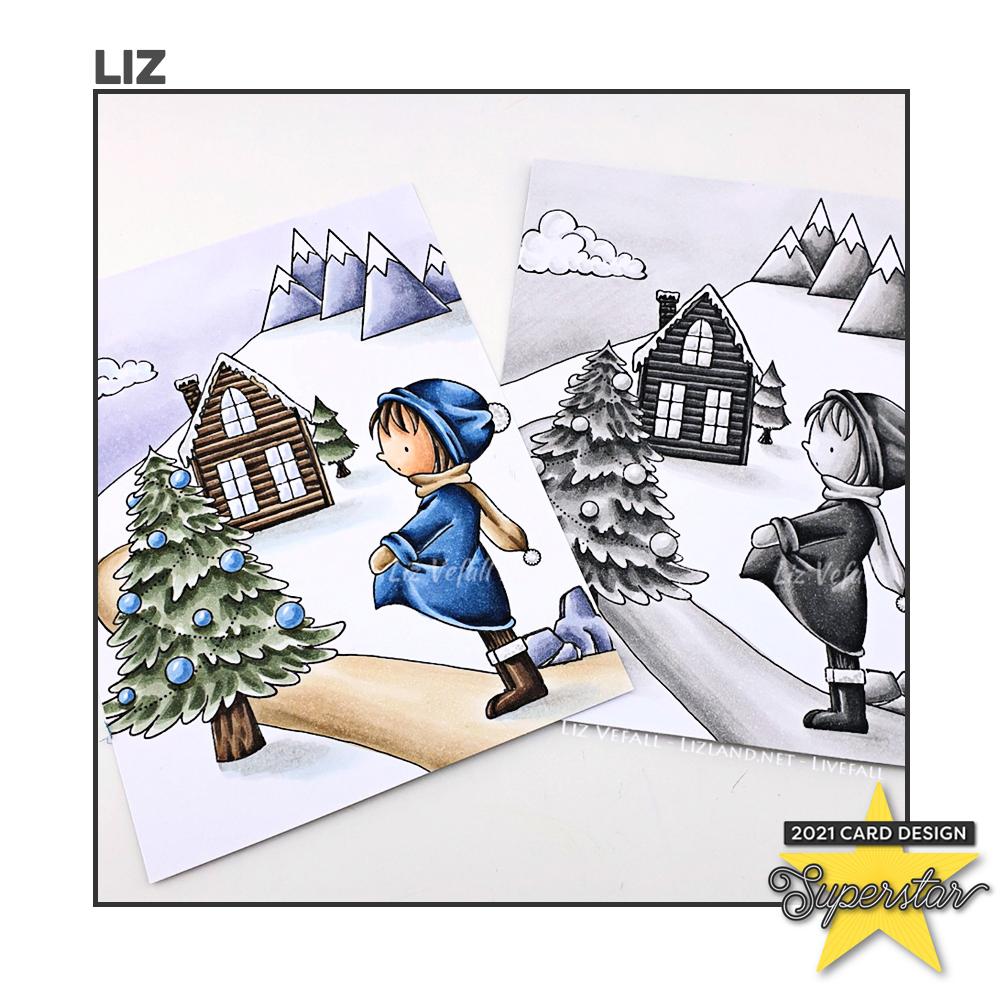
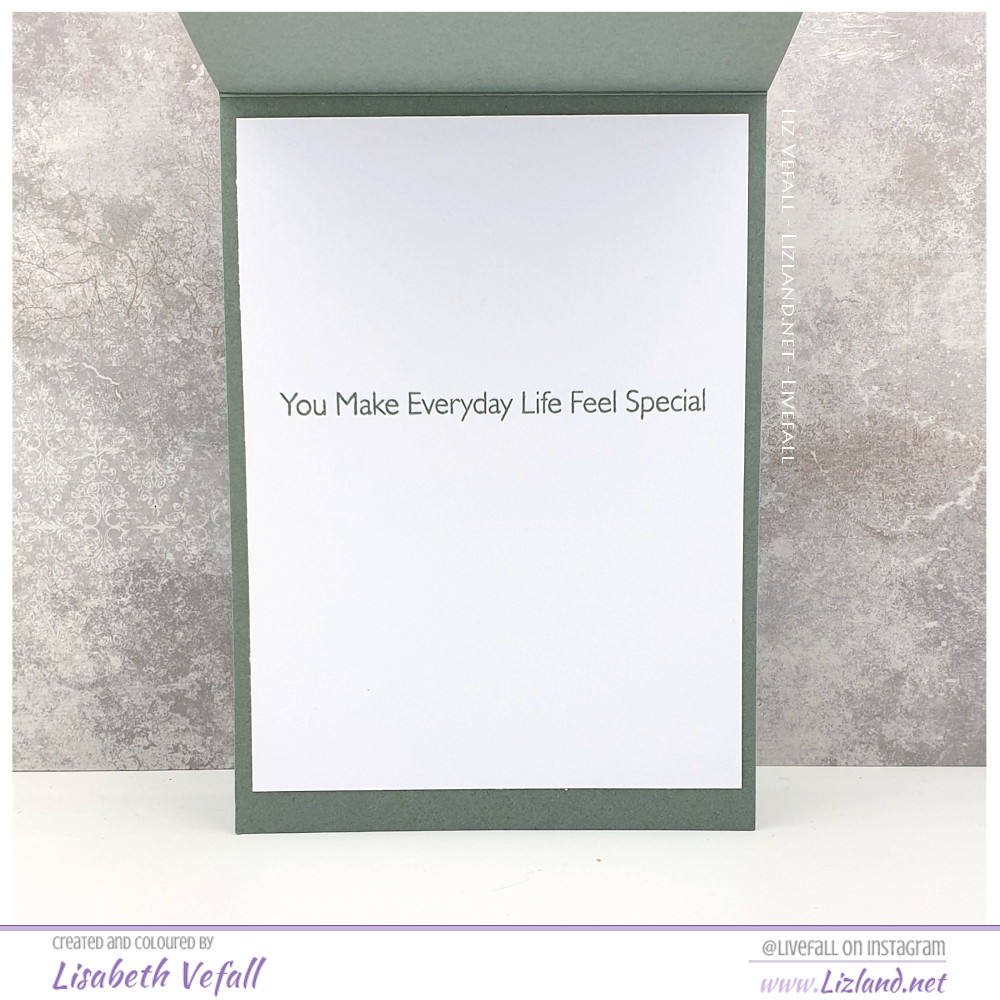
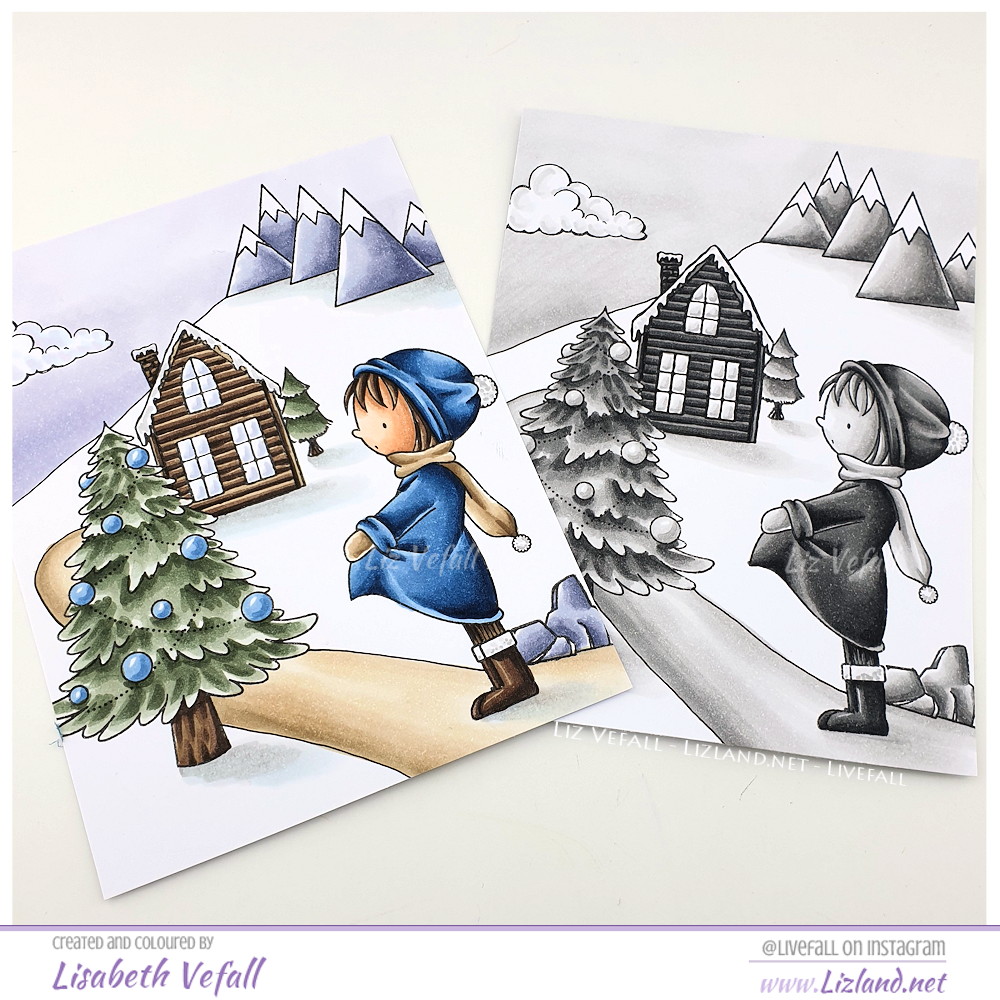
Anyway, here I am with my finished project. I had an idea which I think fits with the last year. How some people make a difference and make your life more colourful. So the front is coloured in black and white, the first page inside is the same image, but in colour, and then it’s a normal greeting area inside with the text “You Make Everyday Life Feel Special”. I have combined various sets from the Birdie Brown and Stacey Yacula collections for the scene.

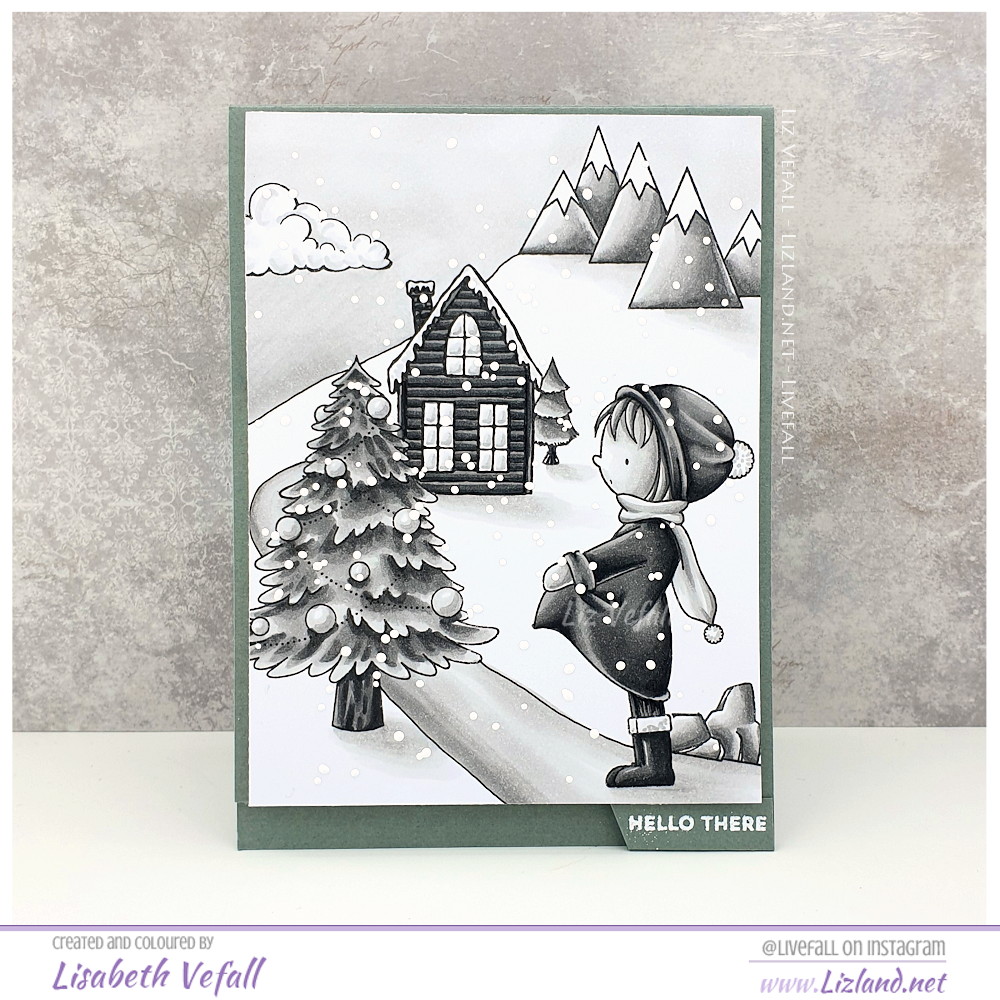
Here is the front of the card. I have used scissors to cut a small tab at the bottom which I embossed a small greeting onto. I’ve also used chunky embossing to create snow on the image.

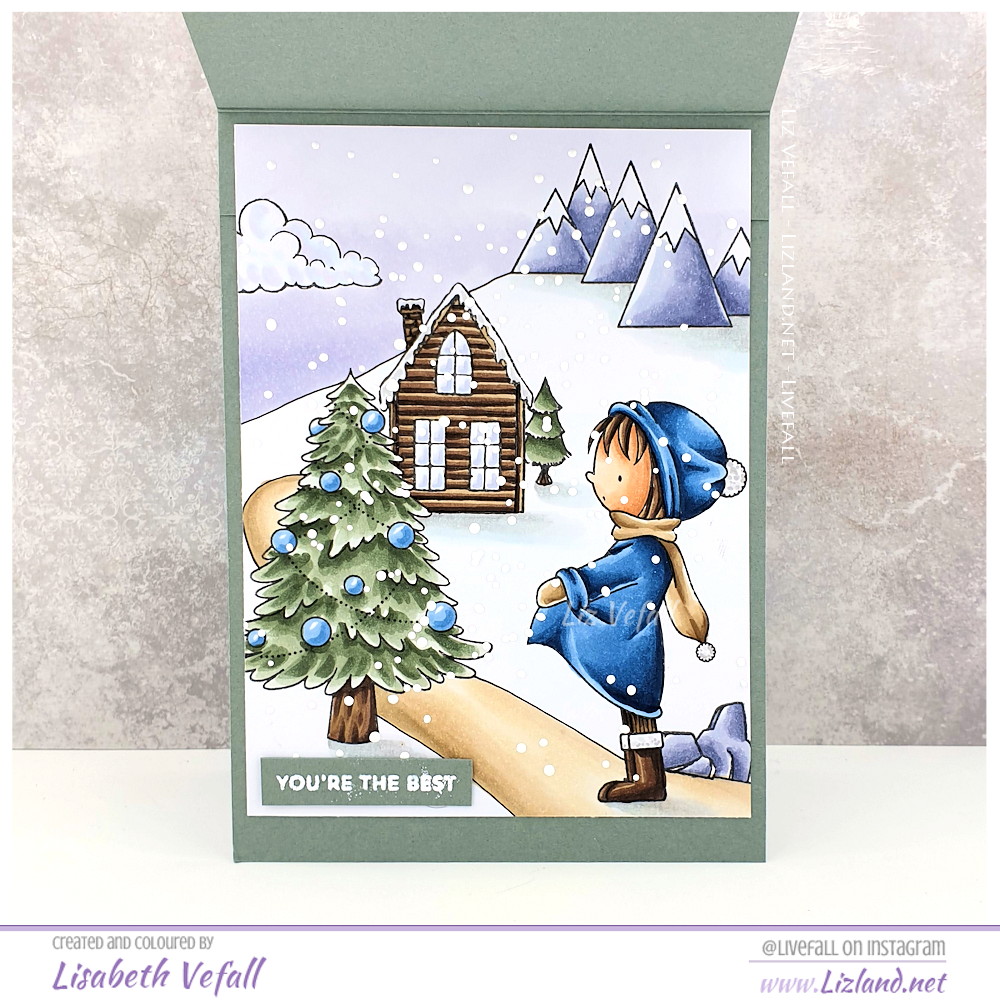
Here is the flip inside with the coloured image. I’ve added “snow” to this panel as well as another sentiment:

And the page inside with the greeting:

Here are the two coloured panels before I made the card:

I’ve used the following stamp sets:

Adorable Adventures
Always Bring a Smile
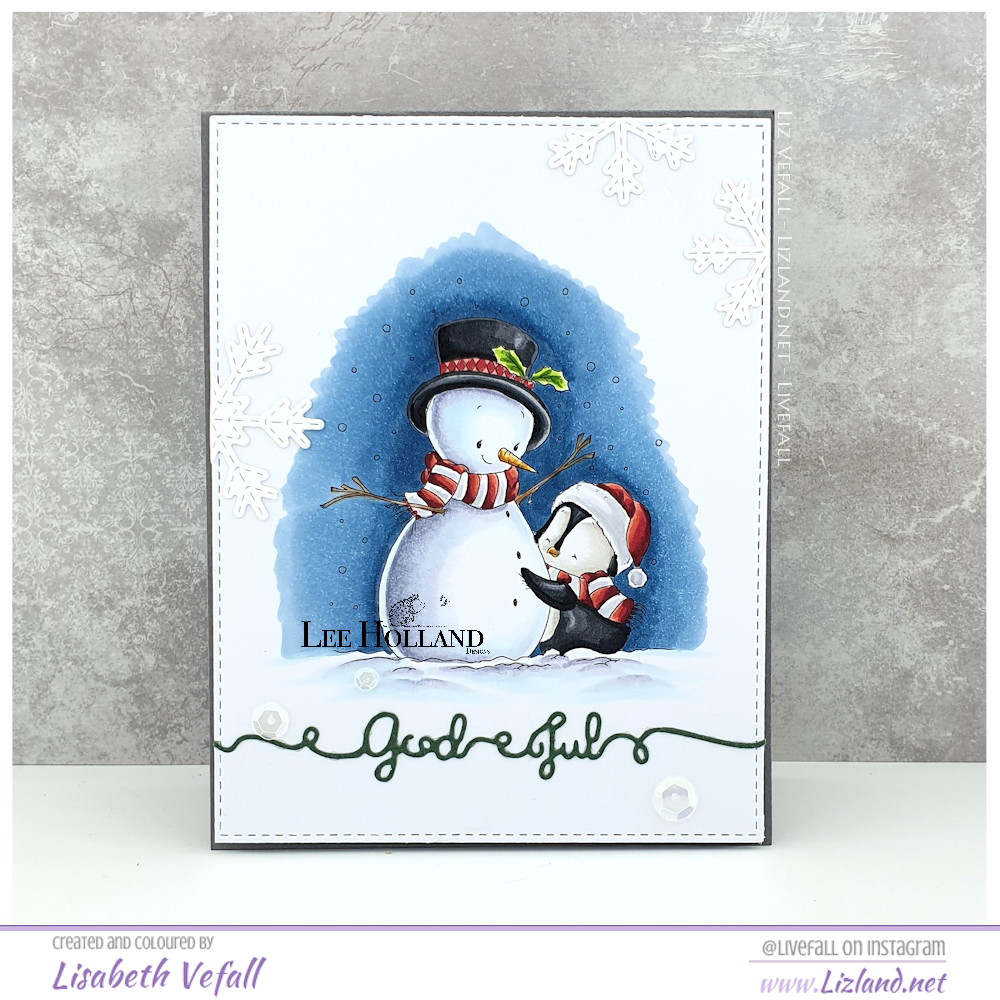
Holiday Penguins
Itty Bitty Basics
Merry Wishes
Scene Builder
Warmest Wishes

Copics used: (black and white image) T0, T1, T2, T3, T4, T5, T6, T7, T8, T9.

Copics used: (colourful image) E00, E02, E13, E15, E41, E42, E43, E44, E47, E49, B91, B93, B95, B97, B99, BG000, BG90, BG93, BG96, BG99, BV000, BV20, BV23, BV25, V20, V22, T1, T3

The card has been entered into the following challenge:

MFT Stamps Superstar – Coloring Virtuoso

Post update:

Oh my goodness! I am so happy to share that my card was chosen as one of the winners. Thank you so much!

LH Snowman with penguin

I have made yet another card for Lee Holland’s august sale. This time I’ve coloured up Snowman and Penguin. The stamp is coloured up using Copic Markers as per usual and I’ve gone with a darker sky and gave it a hard edge against the white coloured card stock.

The coloured panel has been die cut using one of MFT Stamps rectangle dies and I’ve added some Memory Box snowflakes around the edges. A swirly God Jul sentiment sits nicely across the bottom with some semi-transparent sequins around it.

Through August (2021) Lee Holland is having a promotion of 30% off if you buy 3 or more stamps. Or if you fancy the entire Ultimate Christmas bundle and Christmas Dragon bundle use the code CHRISTMAS60 to get 60% off!

LotV Winter Moonlight

I’ve finally got a bit more crafting time and I’ve spent the past week colouring up various images. However, Lili of the Valley is having a new Christmas and winter release today so of course I had to make a card with one of the new images! I’ve used the image Winter Moonlight for this project.

The background paper and “klem” part of the sentiment are from Papirdesign and the big letters are by Altenew. And of course the card is blue. It is my favourite for this kind of card after all!

Lotv Cupcake monkey

Time for another Lili of the Valley design team project. This time it comes bearing great news as well. Lili of the Valley will offer a few stamps as clear stamps and this cupcake monkey stamp is part of one of the two sheets of stamps! They will also be available in digital format as usual. For more information on the clear stamps visit the Lili of the Valley website. All the new digital stamps will be available here once they’ve been released on Monday.

The fun background on the card is also from Lili of the Valley and is a part of the Watercolour collection. The sentiments are from Papirdesign (the die cut) and Mathia Design (the stamped text).

Lotv Snow james

Did you see the video I added the other day? Where I coloured up this adorable little bear? If you didn’t, you can find it here.

Today I’m going to show you the card I made with said colouring, James in the Snow by Lili of the Valley. I used Maja Design background paper for a nice rich green panel and then cut the coloured panel into a smaller rectangle which was added off-centre with foam tape. A few snowflake chipboards and two die cut sentiments glued on top of each other was all I needed to finish off the look on this card. The die cut is from Papirdesign.

You will also find several other cards featuring the very same image on previous blog posts through the years. I have used it loads!