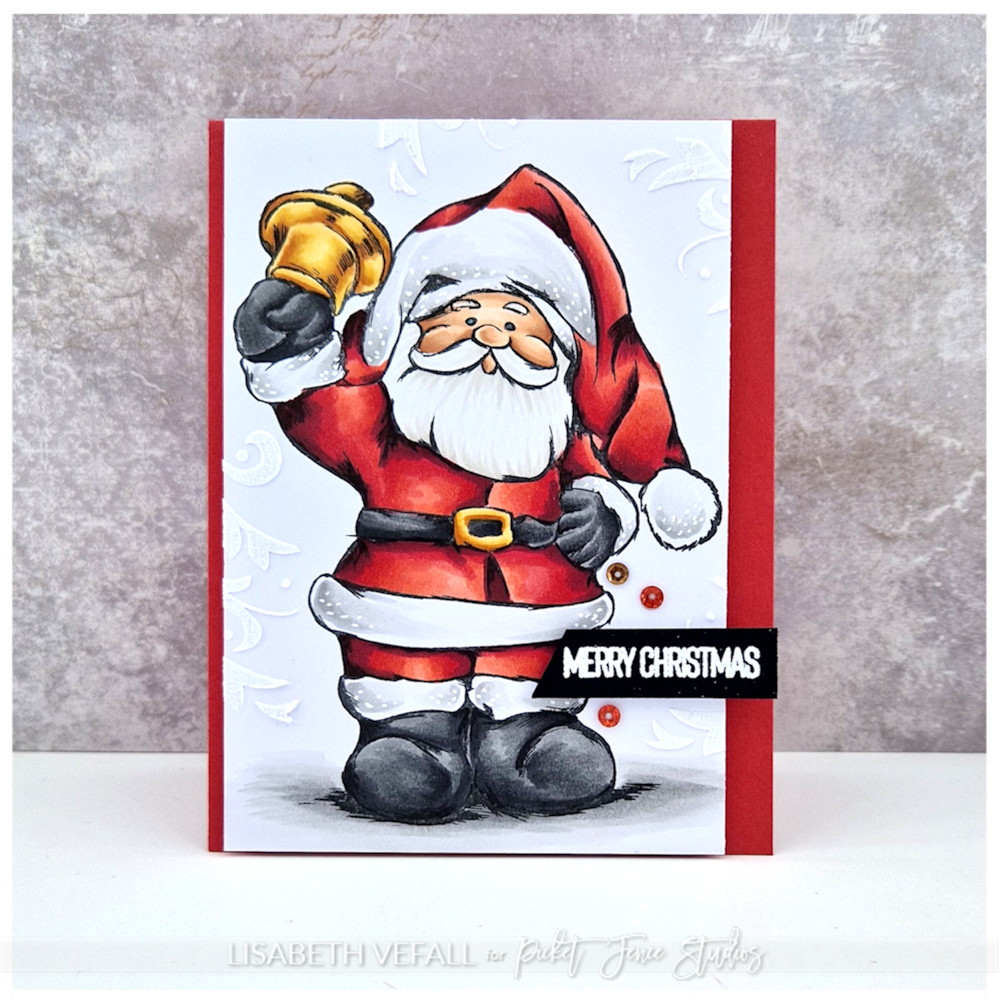
It’s time for Santa to visit my blog. With two months and a couple of weeks to go it’s soon going to be time to mentally prepare for Christmas and all that comes with hahaha. This Santa Claus Comes Tonight from Picket Fence Studios covers up the card front nicely and he is pretty easy to colour up. I’ve used some of the Paper Glaze Snowdrop White and the Fancy Christmas Tree blending stencils around him and then a small sentiment to go with. Card making doesn’t have to be complicated 🙂
I put the coloured panel off to the side, and kept the same height as the card base.
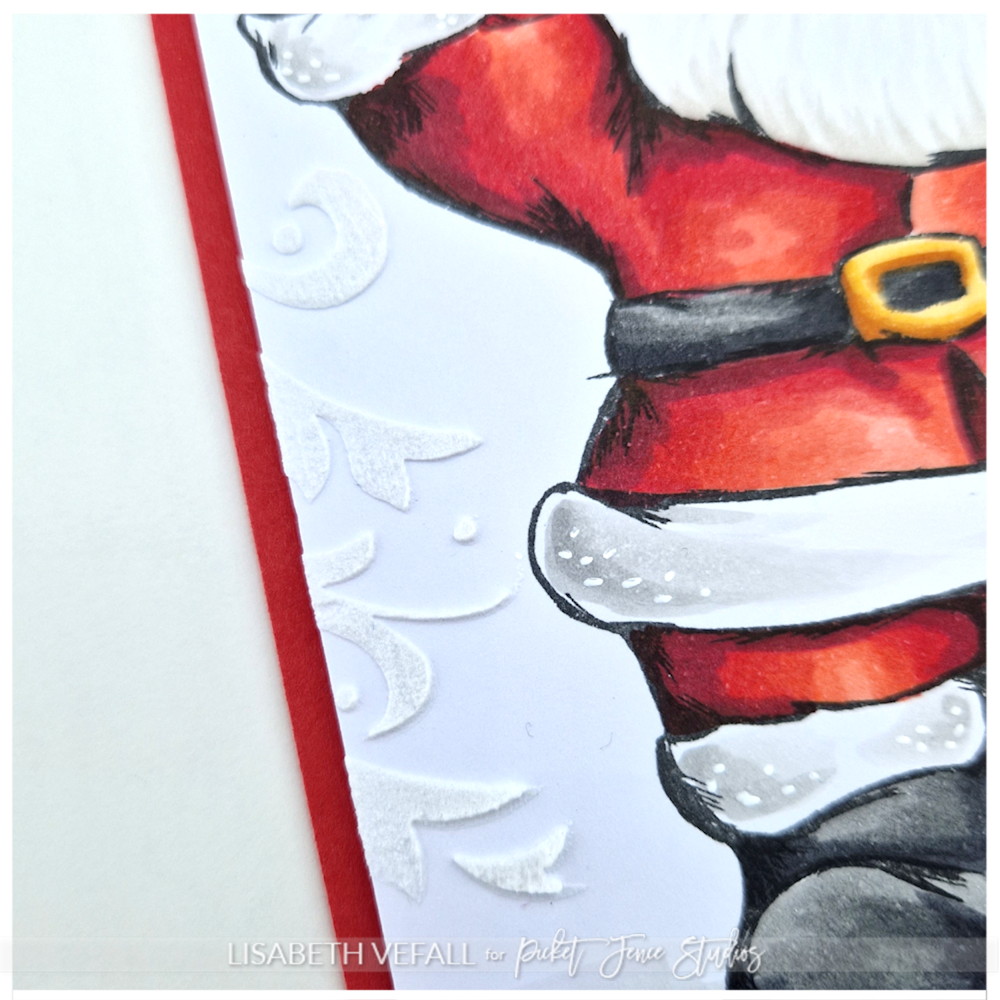
You can see the swirls from the blending stencil and the texture quite well on a close-up.
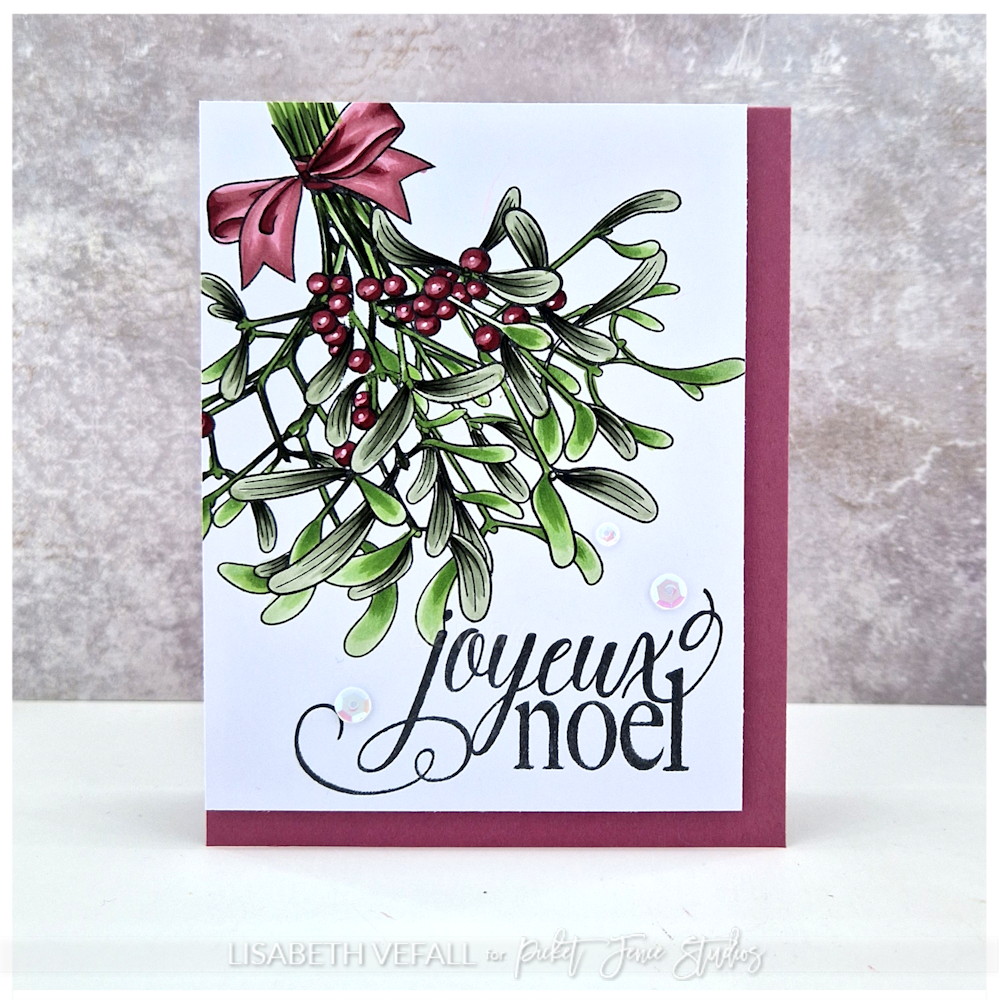
There are a few big stamps in the latest Picket Fence Studios (this and all links in this post are affiliate links) release and the Mistletoe Kisses is one of them. I’ve chosen to stamp it in the top left corner so that I could fit a big sentiment as well. I opted for Joyeux Noel from the stamp set with the same name. A few sequins from the Christmas Flurries embellishment jar were placed around the sentiment, and I stuck with my top left positioning when putting the coloured panel onto the card base as well.
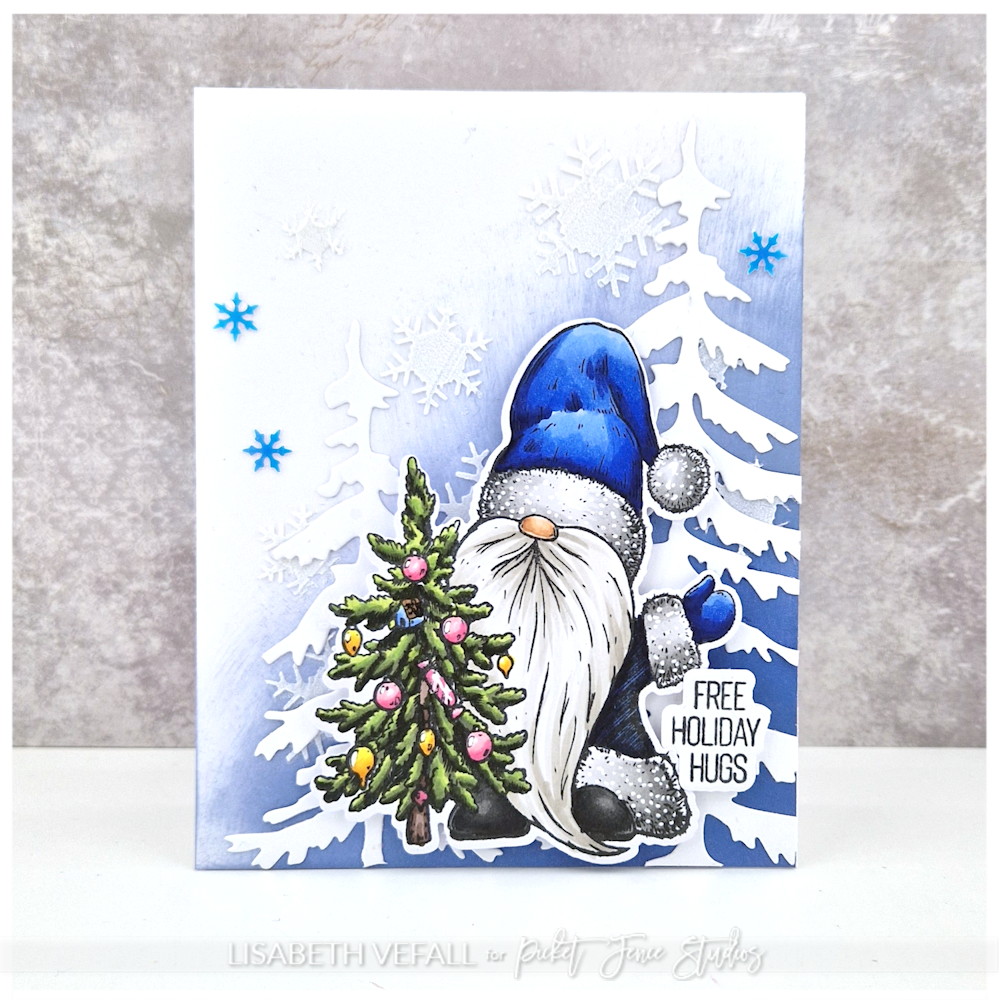
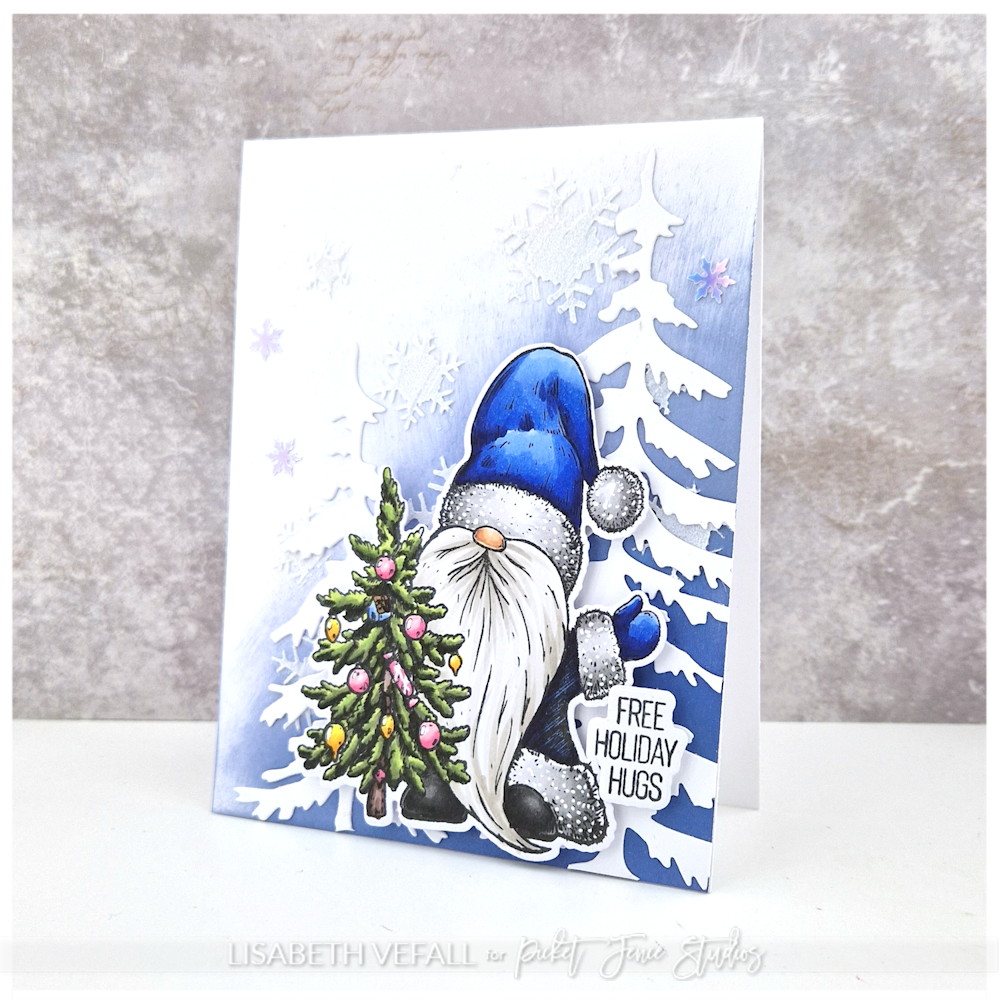
It is new release day at Picket Fence Studios (this and all links in this post are affiliate links)! I’ve had fun playing with it and opted for blues for my first card this time. I’ve coloured up the Merry Good Gnome and used the matching die to cut him out. Then I popped some foam tape on his pack and put him aside while I was playing.
First I inked up the background in two shades of blue. I stuck with the bottom right side of the card and deliberately made the edges look rough and bold before I used the Paper Glaze Snowdrop White on the snowflakes from the Fancy Christmas Tree blending stencil. While that was drying I cut out two of the Slim Line Giant Christmas Trees. I cut them to different heights and placed them onto the card before gluing the gnome on top. The Animal Crackers A Penguin Christmas has some nice and small sentiments so I used one of those, and the matching die, for a small sentiment in the bottom right hand corner. At the end I placed three shiny snowflakes from Santa’s Cookies sequins mix plus.
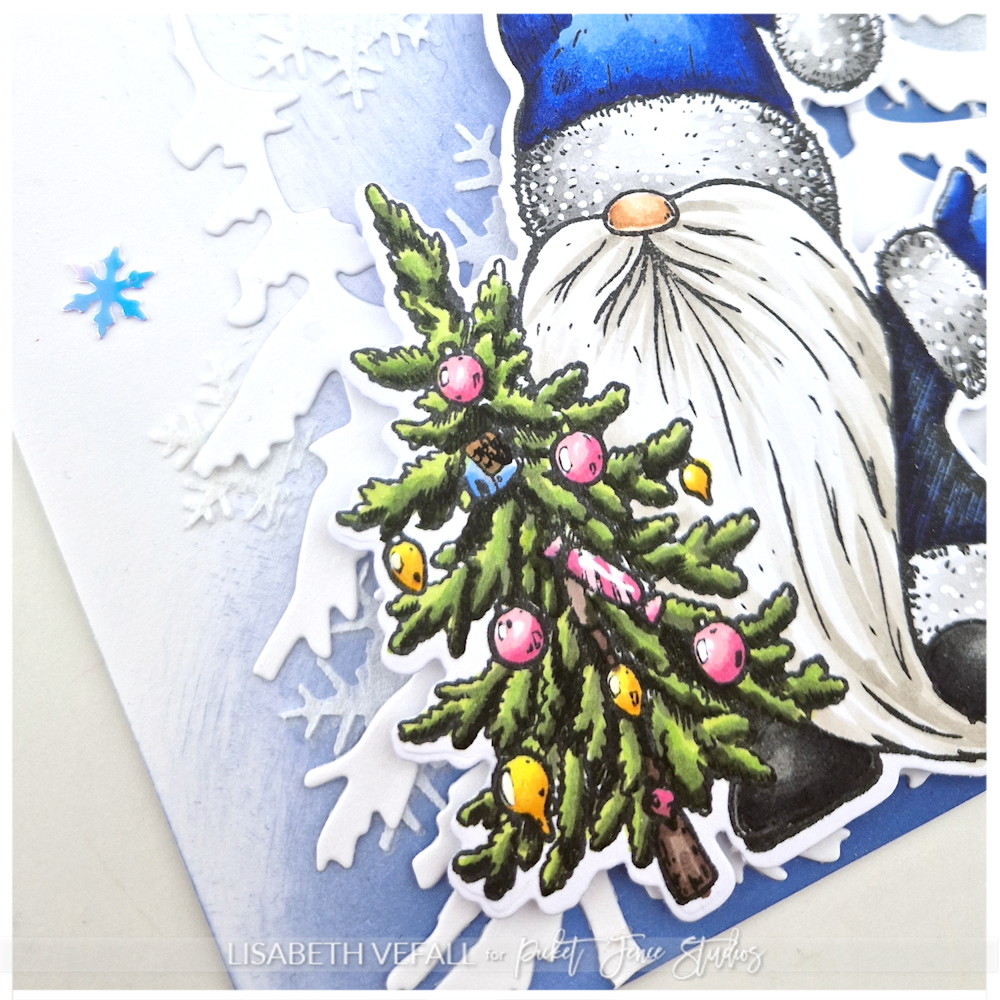
You can see that the snowflakes from the sequin mix have a completely different look when the light hits differently. Here they are much more subtle. Loving it!
And a little close-up! See the cool shiny snowflake?
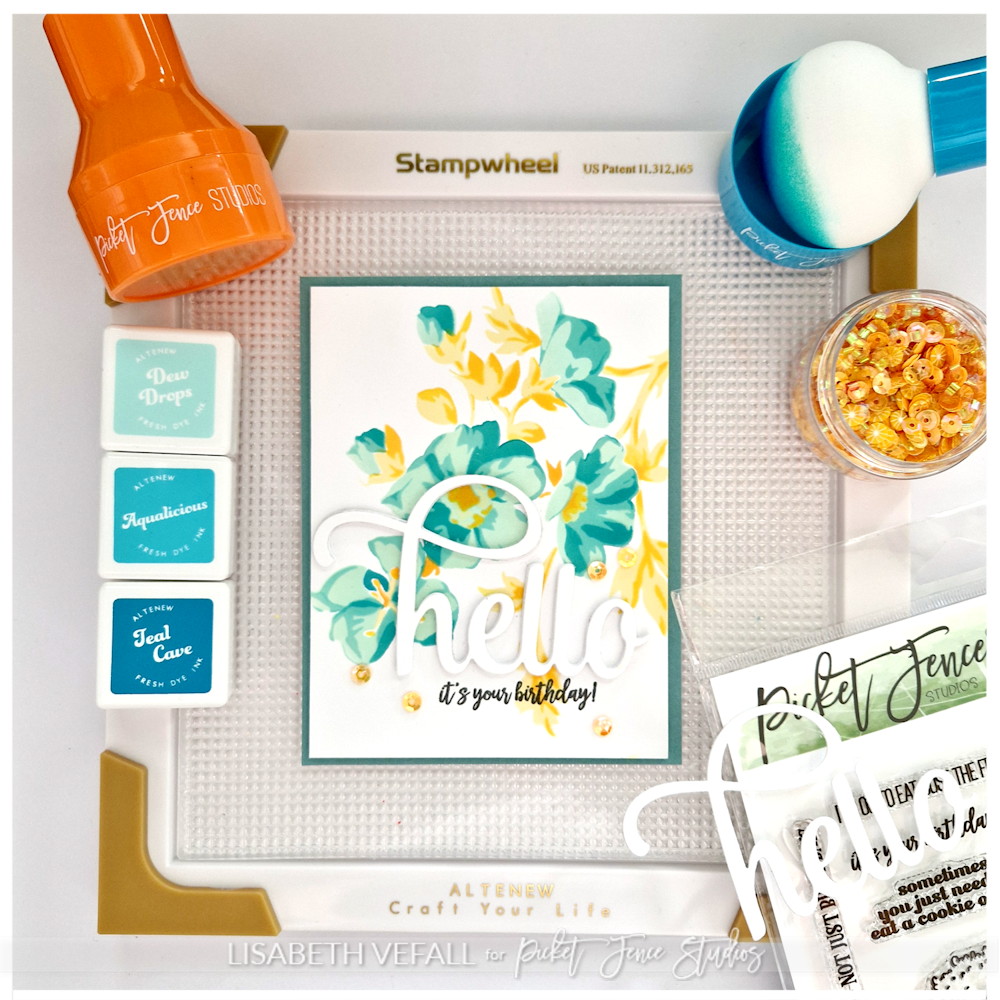
This is it! I’ve finally made my first cardmaking video! I’ve used the Stampwheel, some stencils, various inks and the Paper Pouncers. This video is made as part of a collaboration between Altenew and Picket Fence Studios (these and all links to follow are affiliate links). It is a video hop with various prizes, so please visit YouTube HERE to take part in the hop and see all the details about the Giveaway!
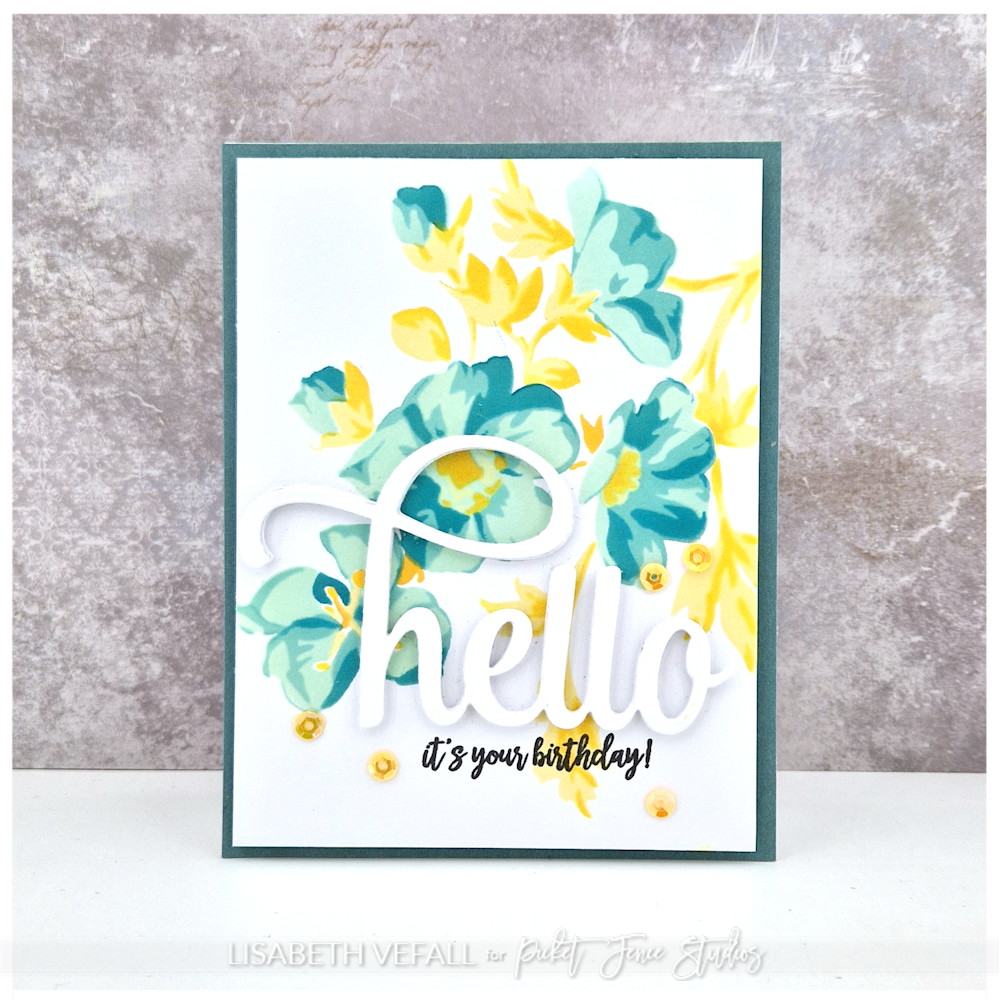
This was so much fun. I used the Paper Pouncers Bright Rainbow and Paper Pouncers White to apply the ink through the stencils. They are perfect for getting all those little details showing. I used some new inks I bought at the weekend on the Swamp Buttercup stencils I bought this spring. Several layers of the Oversized Hello die in white made worked really well on top, I thought. Below you can see the video of the cardmaking process:
For the Stampwhel itself, please visit Picket Fence Studios here or Altenew here.
For this collaboration I have been gifted a Stampwheel to try, and various Picket Fence Studios products as part of my design team spot at PFS. The remaining Altenew products are my own purchases. All products used to showcase the Stampwheel are my own choices.
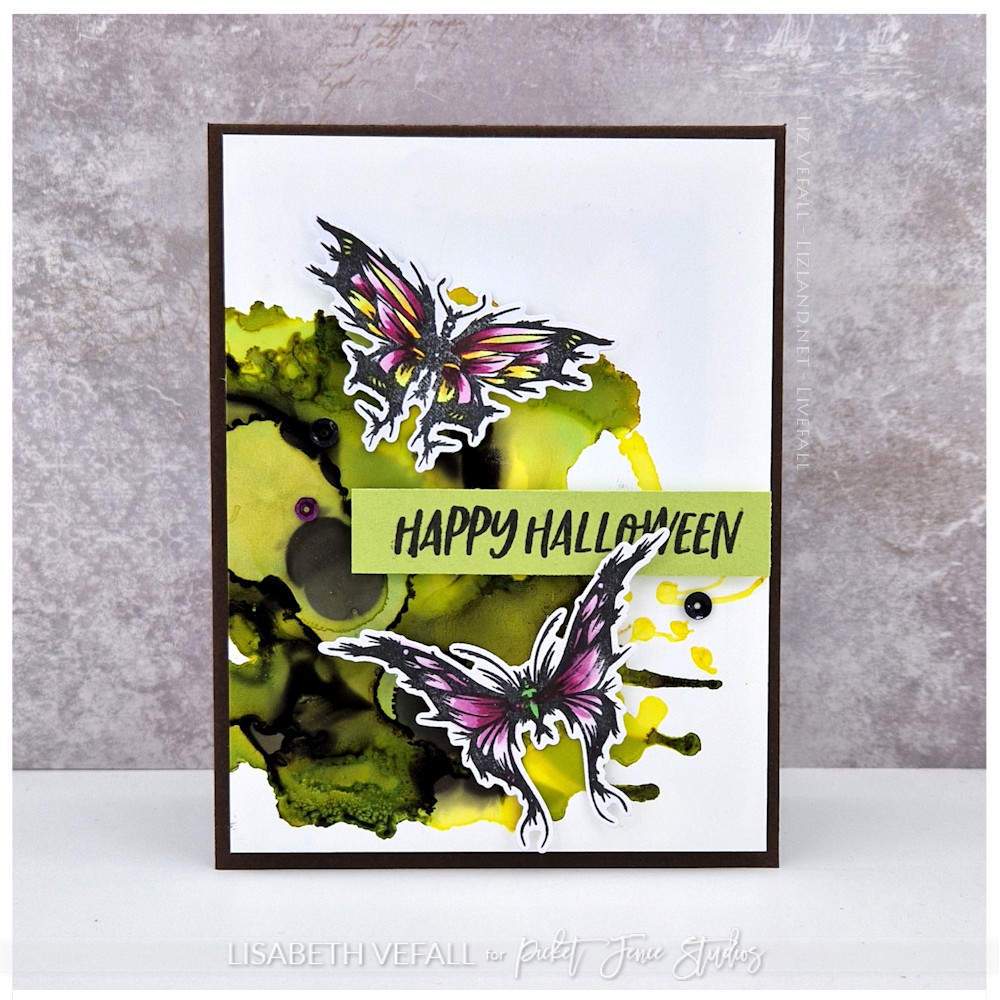
Picket Fence Studios (this and following links are affiliate links) is releasing a frighteningly fun kit today! It is called A Spooky Flight and is all about Halloween.
I’ve finally played around with alcohol inks for this card! There are two green colours included and I’ve added a dash of yellow to go with. I absolutely love the spooky butterflies, so had to use them right away!