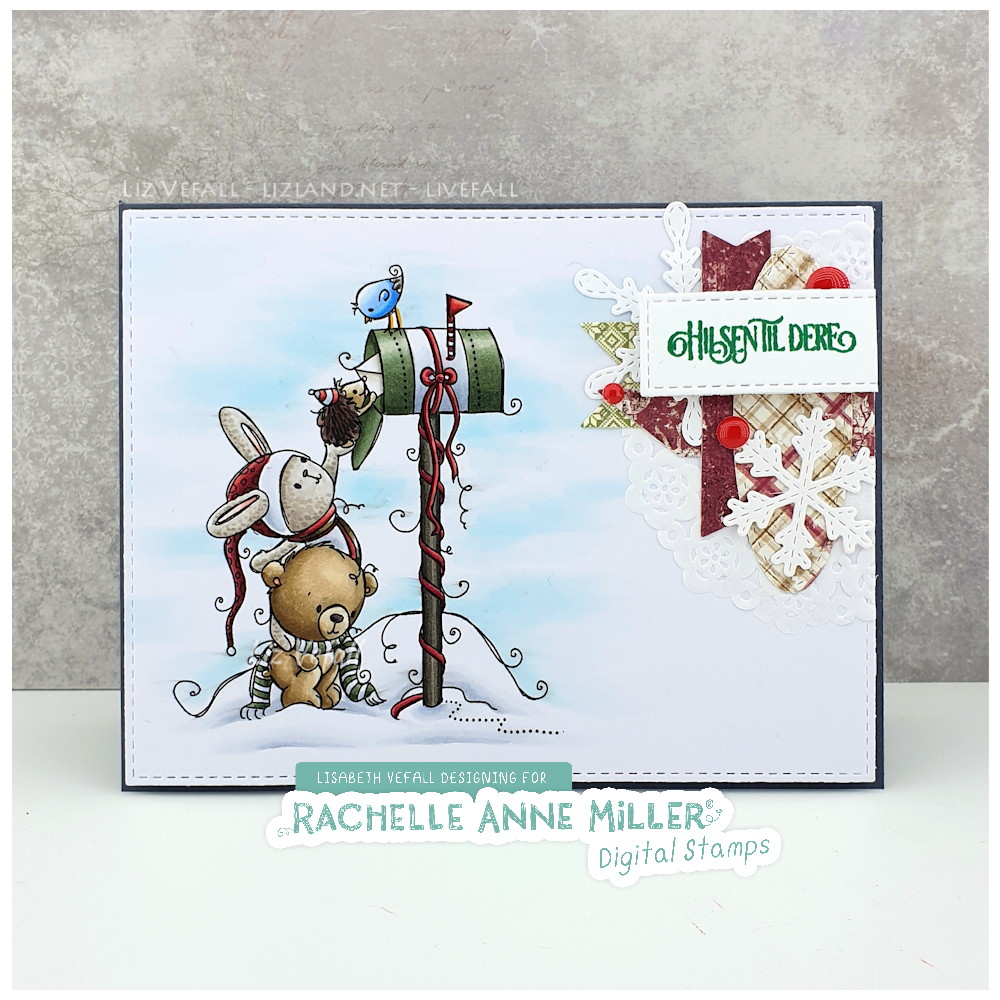
I have finally been able to sit down and make a few cards again. First one out is this adorable stamp by Rachelle Anne Miller. It is called Letters to Santa and I’ve coloured it up with my Copic markers.
The card itself is reasonable simple with a die cut main panel and some paper scraps die cut into various scraps for the cluster in the corner. The sentiment is from Papirdesign and most of the paper scraps are Maja Design papers.
I looked at my phone this morning and it said “October”. I’m not sure I’m ready for that. Don’t get me wrong, I love the beautifully coloured trees, the fresh wind and the non-guilty hot-chocolate moments with a blanket because it’s not too warm for it anymore, but still. Winter is just a tad bit too close. That also means Christmas is coming closer. Are you ready? Have you started on your cards? Mine are actually mostly done! And I have another one to show you today.
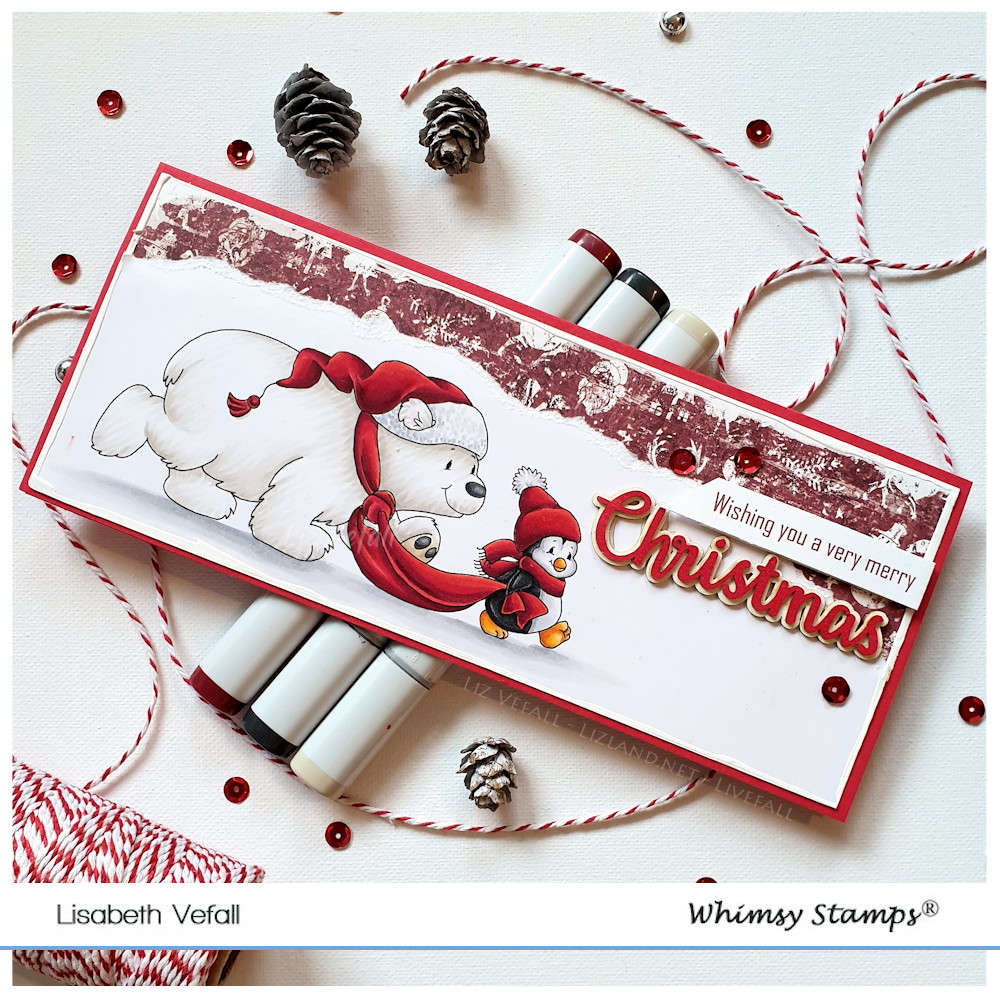
A new month also means a new Whimsy Stamps release! I’ve played with one of the new digital stamps. It has a penguin AND a polar bear. Doesn’t get much better than that, right? You can find it here. I didn’t use any dies this time as I cut the coloured panel and then I just tore across the top so I could have some background paper peeking through, but if you prefer dies then the Slimline card builder die so work well for this.
Another Polkadoodles project on the menu today! The stamp is called Just for You and I’ve opted for traditional reds and greens in the colouring. For the card itself, however, I wanted a blue and white wintery feel, so I used patterned paper in those colours which I painted with white acrylic paint around the edge. The peace and joy background paper is from the Gnome Season paper pack. The circle die is from the stitched and pierced nested circles set.
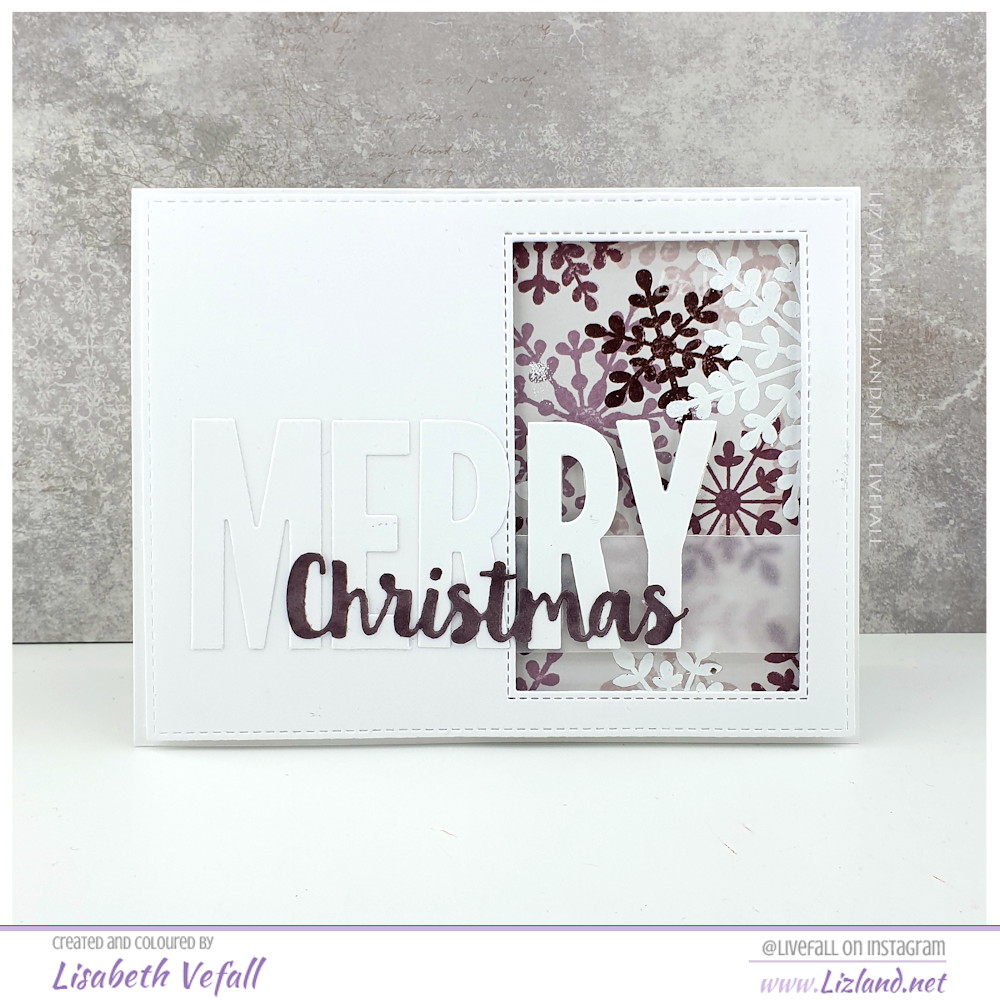
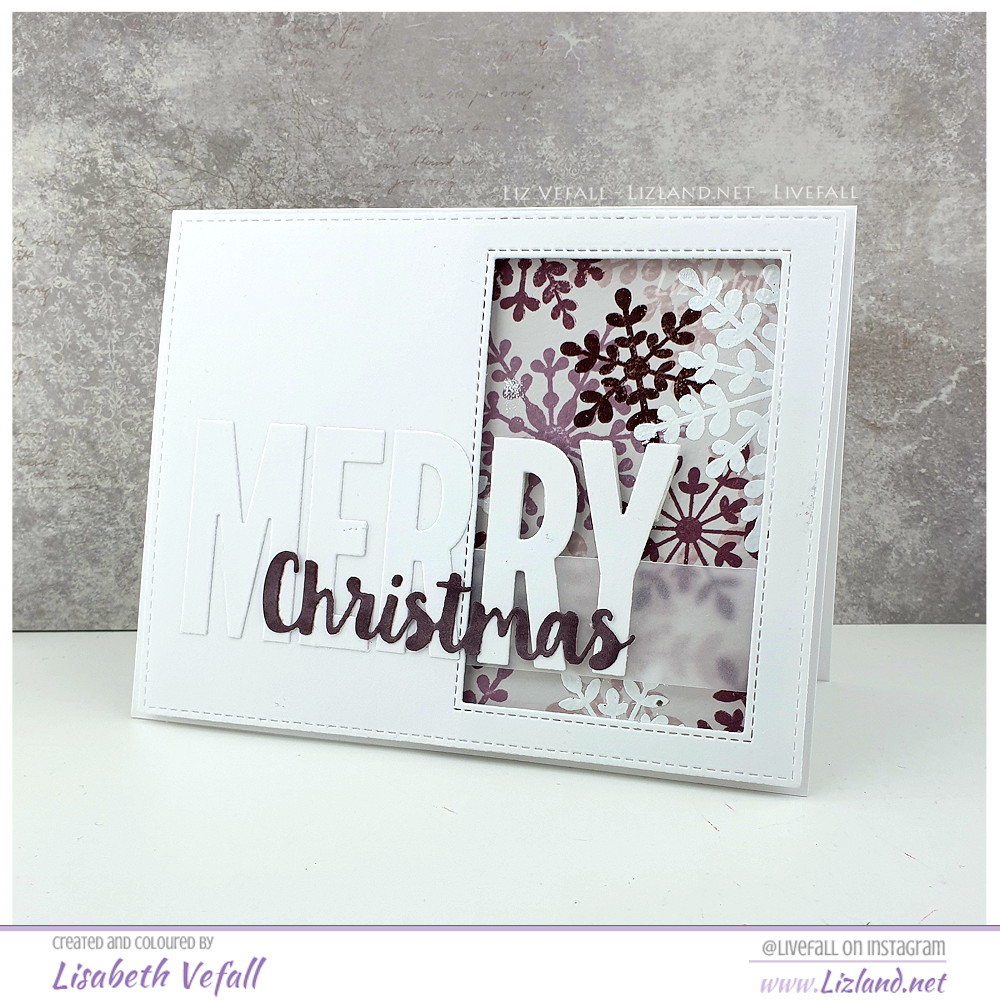
Here is my second card for the annual Superstar Challenge at My Favorite Things. This time I’ve taken a massive leap out of my comfort zone and made a simple card without a coloured image. I spent some time carefully stamping up snowflakes in various sizes and colours and then I used only a small portion of what I’d stamped up for this card. I’ll probably use another part of the panel (and show you the other colour I stamped up at the same time) at a later date. But for now, let’s take a look at my entry in the Clean and Simple Genius category.
I have used one of the Stitched Rectangle dies for the panel and then the inner frame is cut out using the Inside and Out Stitched Rectangles. Merry is made using the Impact Alphabet dies and Christmas is from a die set called Merry Christmas. I decided to go for white on white with the bigger letters and then I used RV99 (Copic) to colour Christmas in a matching colour to the snowflakes.
I’ve used foam tape and vellum to raise the letters off the homemade background. I made the background using the Serene Snowflakes stamp set and stamped the snowflakes at random with 4 different shades of dusty pink and then embossed some white snowflakes on top. It’s a bit of an unusual colour for Christmas cards and snowflakes, but I think it works well, actually.
The new Lili of the Valley release is due on Wednesday and it’s full of adorable little Christmas stamps as well as other fun things such as background papers. This time the stamps will be available as both .png and in lighter colours so you can colour them in no-lines without it being too fiddly. Great, right?
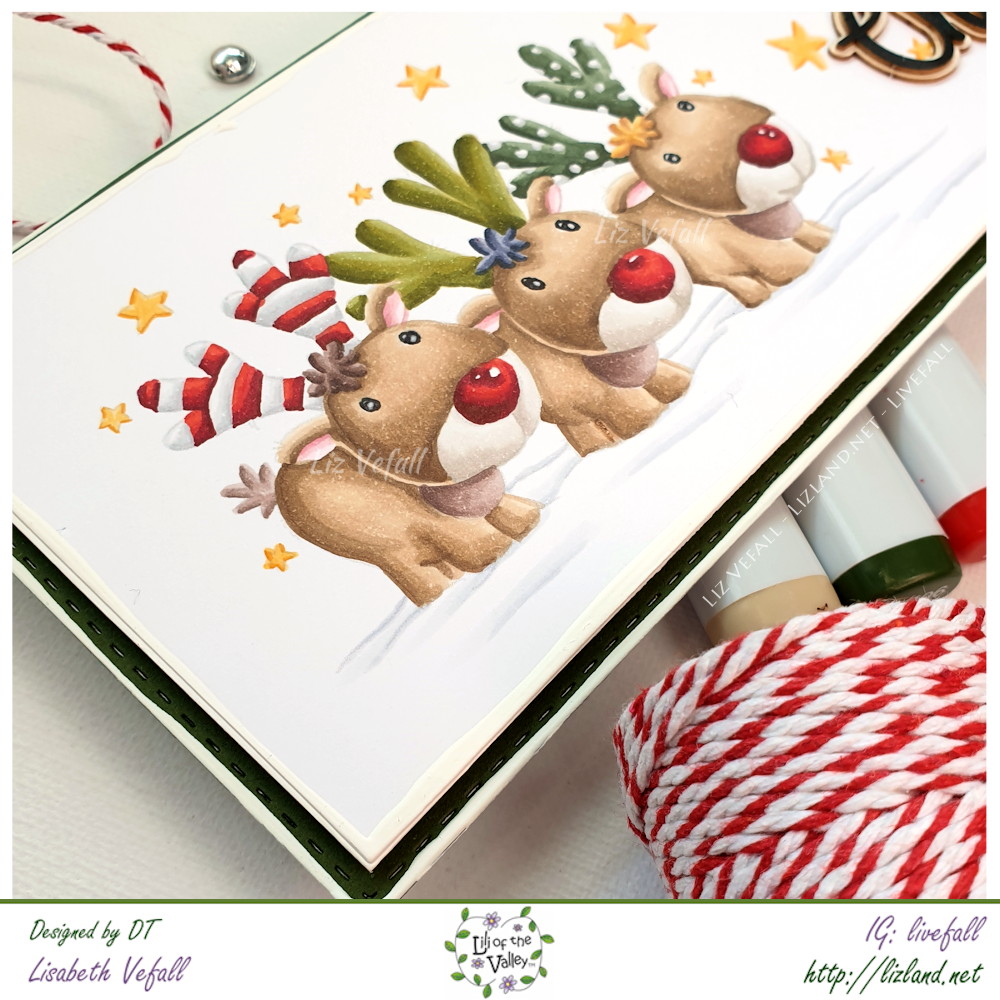
I wanted to make a slimline card using the three little reindeer. I coloured them up in no-lines and once it was pretty much all done, I decided that I wanted to use a printed sentiment to go with. I had already made the card front double thickness and painted white around the edge as well as finished colouring up the image so I was prepared for the printing to go bad. In fact I just did a quick eye measurement for the positioning of the sentiment as I thought it would just ruin what I’d made. (It’s only paper, right, so have to give it a go anyway, haha.) It worked out perfectly and the placement looks like it was done a lot more carefully than it was! I definitely don’t recommend doing it this way, though, haha!
The sentiment is from the Christmas Circular and more sentiments. I removed the word Christmas to make room for my chipboard and then moved the two snowflakes a little bit further down. I also drew in a few extra stars to make them cover more of the card panel. Finally I glued on three enamel stars. Let’s have a close-up of it.
And a close-up of the reindeer. You can see what colours I used below.