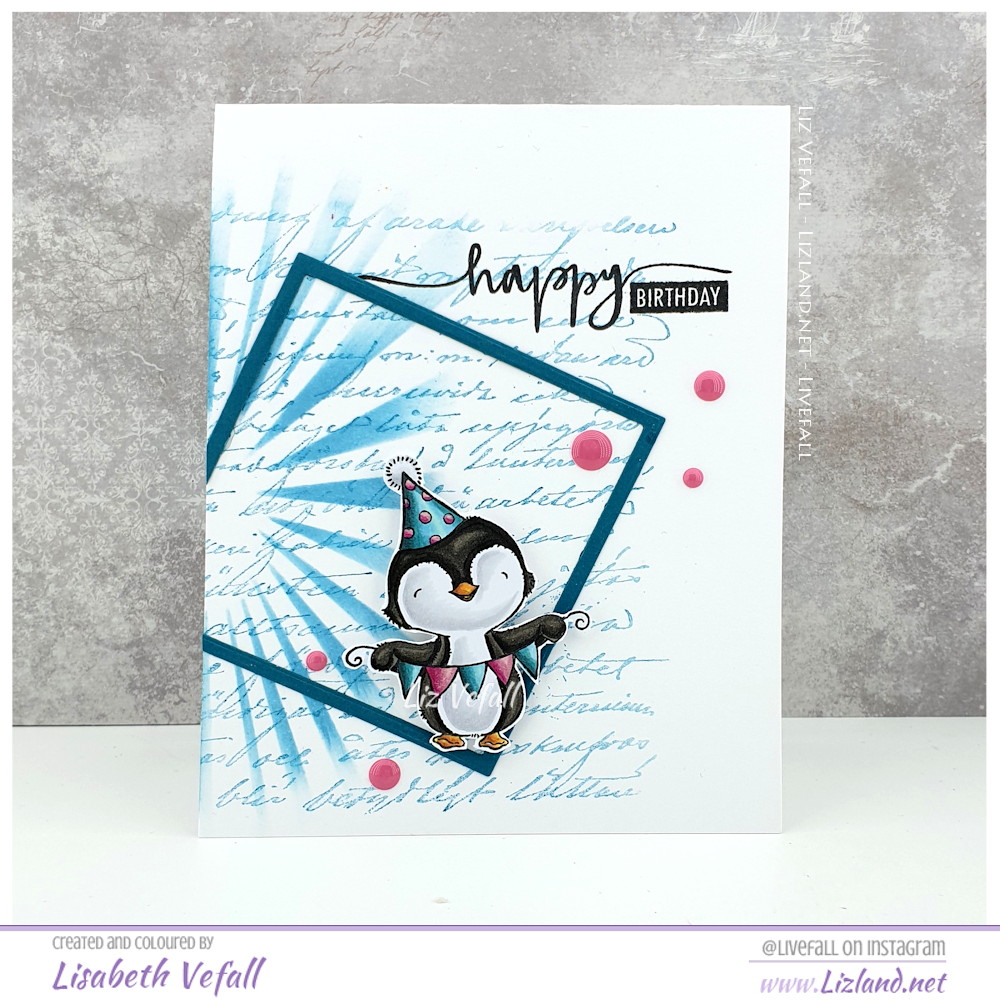
I have another fun card to share today. I’ve used a background stamp from Simon Says Stamp together with a Pinkfresh stencil and some Distress Oxide inks to create the background. Both the penguin stamp and the die cut border are from MFT Stamps and the sentiment is from Avery Elle. To finish it all off I used some Altenew enamel dots.
This card has been entered into the following challenge:
Time for another Christmas card, and once again it’s a rather blue one! I’ve used distress oxide on a background stamp from Simon Says Stamp together with dies from MFT Stamps (frame) and Papirdesign (sentiment). The stamp, by Whimsy Stamps, is coloured up with Copics and a few blue sequins finished off the look.
One of the cards I made in December and never got around to sharing is this one I made with the Mama Elephant Penguin Christmas Tree. Isn’t it fun?
It is another simple card where I’ve used one of MFT’s rectangle dies for the main panel, cut out some Memory Box snowflakes and added a premade sentiment from Simon Says Stamp (the CZ-collection) on foam tape over two of them.
I wish you all a very Merry Christmas and I hope you are able to spend some of the time with at least one of your loved ones in this difficult year.
Here I have used the Merry Wishes stamp set by MFT Stamps and coloured in the whole panel with my Copics. The card itself is kept simple, so I stamped a sentiment from the Christmas Cheer (MFT also) set onto the coloured panel and then die cut it with a rectangle STAX frame (MFT) before using foam tape to attach it to the purple card base (MFT as well).
The stamps have been masked together. It can be a bit fiddly, but remember that you only need to cut out the part that is used for the masking. I tend to keep used masks together with the stamp set so I can easily reuse them another time. You can always cut out the rest of the mask another time if you want to use another part of the stamp for masking.
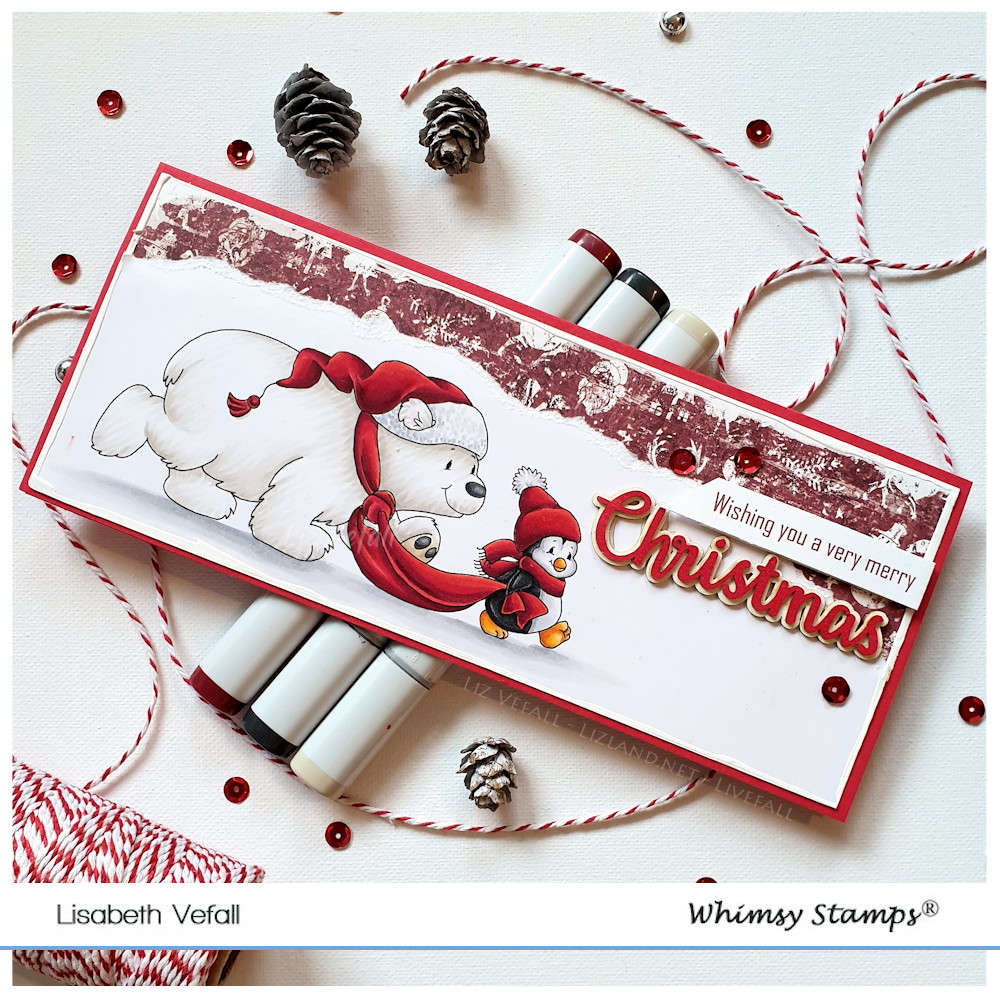
I looked at my phone this morning and it said “October”. I’m not sure I’m ready for that. Don’t get me wrong, I love the beautifully coloured trees, the fresh wind and the non-guilty hot-chocolate moments with a blanket because it’s not too warm for it anymore, but still. Winter is just a tad bit too close. That also means Christmas is coming closer. Are you ready? Have you started on your cards? Mine are actually mostly done! And I have another one to show you today.
A new month also means a new Whimsy Stamps release! I’ve played with one of the new digital stamps. It has a penguin AND a polar bear. Doesn’t get much better than that, right? You can find it here. I didn’t use any dies this time as I cut the coloured panel and then I just tore across the top so I could have some background paper peeking through, but if you prefer dies then the Slimline card builder die so work well for this.