I’m joining in with team 1 this month for our new moodboard challenge at Copic Marker Norge. I have been quite heavily inspired and had some random impulse to just try to make most of it myself.
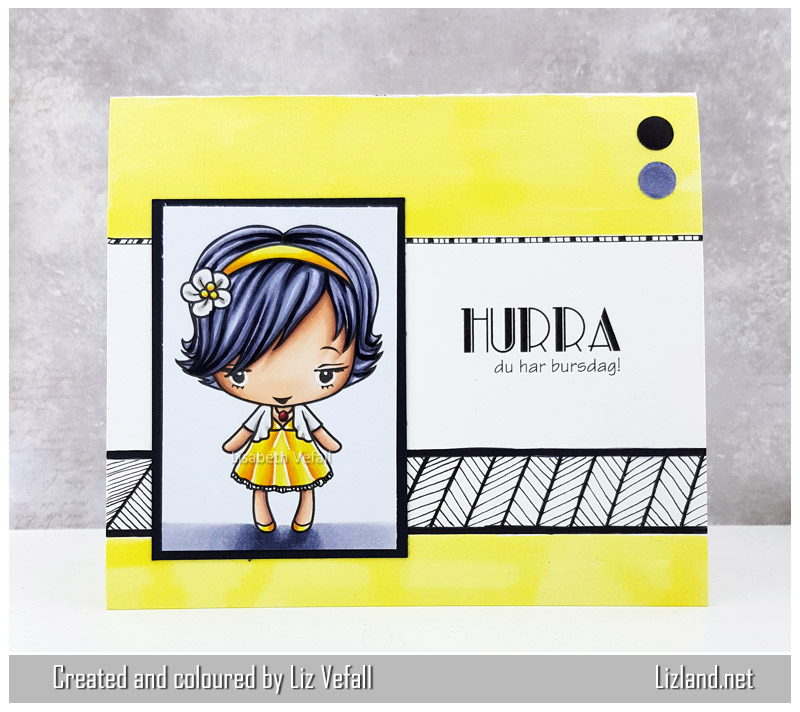
It is funny really… yellow must be the colour I use the least when I craft. I don’t really like it. But this, this I can live with. I think it turned out quite cool!
I’ve drawn in the background with a Copic multiliner 0.1 black. I went with the patterns and feeling I got from the moodboard. (You can see the moodboard here.) I ended up drawing tons of little lines and it was actually fun! I think I will practice this and try it again. After colouring in the border on top I coloured in the yellow with Y11 and coloured in a couple of candi to match (100 and BV25). I then drew three lines across at the bottom and then started filling it in with loads of little lines before I decided to make the bottom part of the card yellow as well.
Before I glued on the image and the candi, I printed out the sentiment I made on the PC straight onto the card base I’d coloured up. Thankfully I managed to get it where I wanted it… that could have ended quite badly, haha. Now I just need to pick out a thicker multiliner next time I am the shops so I don’t have to colour in thin lines again!
The image I’ve coloured in is by The Greeting Farm. This is the first time I’ve made a card with one of their images. Cute one, right?
Yesterday, my boyfriend made me a new box to take photos in, and I LOVE it! I can now have a background behind the photos to make it easier to see the edges of the cards as well as taking photos of the cards a bit side on. Doesn’t it make the photo look great?!
And now I can also take the photos like this! Yey!
Copics used: (skin) E00, E02, E04, E13, E15, (hair) B60, BV23, BV25, BV29, (clothes) Y11, Y13, Y19, E97, W0, W3, W5, (self-made card background: Y11, 100, multiliner)