 Two days ago I flew over to England for a long weekend. A trip perfectly timed to coincide with a crafting show, the crafting show at Bluewater in Kent! Today is the day! It started yesterday, but today suits me better, and it leaves time to go back at the weekend if I haven’t got time to see everything. I am really looking forward to seeing the talent and creations while soaking up as much inspiration as I can possibly manage! I look forward to seeing the Lili of the Valley stand specifically, as it was through their website I found out about it in the first place!
This is a good opportunity to post a card I made in the first half of January and completely forgot to post! It was a birthday card for my boss. It was the first card in a while I’d made with the fold on top, rather than on the side.
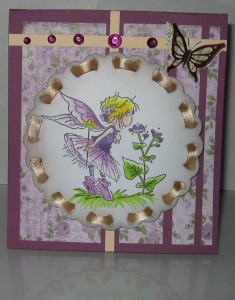
When I was last shopping for paper, I came across this beautiful purple paper with roses on. It seemed perfect for this card, so that was my inspiration here. I chose one of the few plain purple cards I had, and started decorating. I did not want a plain square paper, so I cut it into three different sizes and glued them on next to each other.
I had recently bought new die cut shapes, which I thought would work here. It was a cut and emboss pattern, but I couldn’t get the emboss to work properly, so it felt a bit plain, even after I had distressed it with blues and pink for a purple effect. After surveying my hobby table, I decided to try to use some ribbon in the holes around the edge, and it worked! I pulled it back out, chose the fairy smelling the flower from Lili of the Valley, and coloured it in with matching purple shades, before readding the ribbon border.
To pull it all together colourwise, I added a beige border to the top and middle of the card and added some purple shiny gems (not as pink as they look in the photo below). and a 3d flower in brown and beige in the top corner. I added the stamped image second with some pillow stickers to make it stand out from the card a bit.
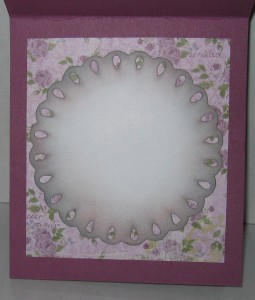
The inside was made very plain, but matching the front. I did cut the paper apart for inside, but kept it as a square. I then added the die cut shame, the same as on the front, but without adding the ribbon, only using the blue and pink distress ink for the edge to get a purple effect.
The photo was taken with my old camera, and aren’t displaying the colours properly, the various purples matched better than this indicates. Sadly I had no opportunity to take a new photo of this card.


