RAM Little Fairy

This is one of my favourite stamps of Rachelle Anne Miller‘s and I have now finally coloured it up and made a card with it. I’ve placed it off centre on the matching red card base and drew a border around the coloured panel. A few enamel dots and an embossed sentiment was added in the top left corner to keep the focus on the coloured image.

Colouring video: Miss Your Smile

There is a new colouring video up on my YouTube channel Lizlandcards and this time it’s my pencils that have gotten to come out to play again. I’ve coloured up this slimline stamp by Pinkfresh Studio called Miss Your Smile designed by Emily Midgett. She draws the most gorgeous flowers!

If you’d like to view it directly on YouTube, click here.

Prismacolor Premier pencils used: Yellow: 1002, 1003, 916. 914, 1011, Pink: 930, 994, 993, 1014, Green: 1092, 912, 1005, White: 938

Statement Flowers slimline

I have made my very first slimline card! You might be getting tired of them by now, but I have coloured up the Statement Flowers by ALTENEW yet again. I can’t help it, I love that stamp! This time I cut out the two flowers after I’d coloured them up. Then I used Pinkfresh slimline die to make a card base onto which I stamped a few of the leaves from the Leaf Clusters stamp set using one of the greens from the Zesty Limes ink cubes set. I used the same green to stamp the “my friend” which is also from the Leaf Clusters stamp set. The beautiful happy birthday die is also from Pinkfresh and I added some enamel dots around the text.

As it is the first time making a slimline card it’s also my first time trying to take a photo of one. It seemed a bit empty without props, so I figured I’d give that a go for a change. I think it worked well enough for a first try!

Copics used: RV000, RV91, RV93, RV95, E70, E71, E74, E77, G94

Bold statement flowers

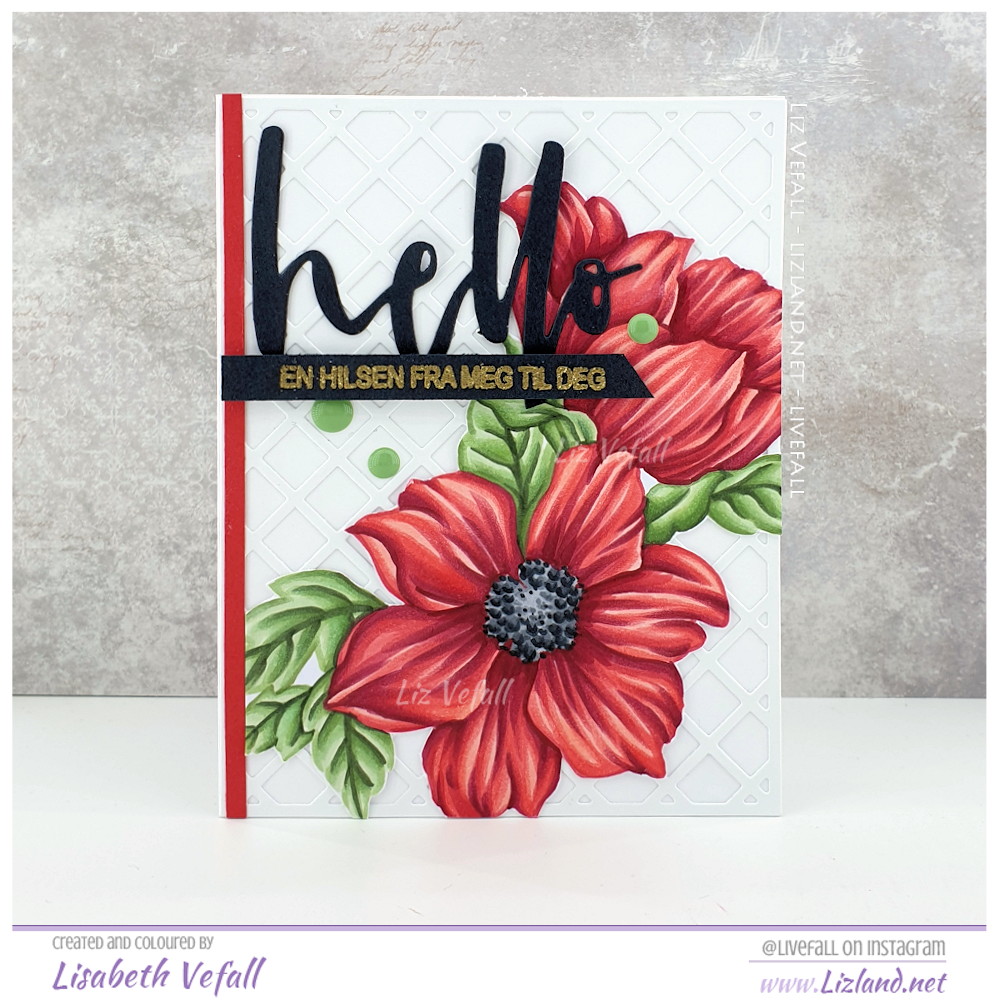
I absolutely love the Statement Flowers, is by ALTENEW. It’s not that often I take time to colour up in no-lines, but so far I’ve only done just that with this stamp. I use the fade-out ink by InkOn3 because it’s awesome. This time I opted for a lot bolder colours by using red. I’ve hand cut the flower after colouring it up.

The card itself is made by die cutting the Trellis die in white and gluing it back onto white cardstock. The hello die is also by Altenew and so are the green enamel dots which are part of the Green Fields set. Lastly I embossed, in gold, a sentiment from Mathia Design.

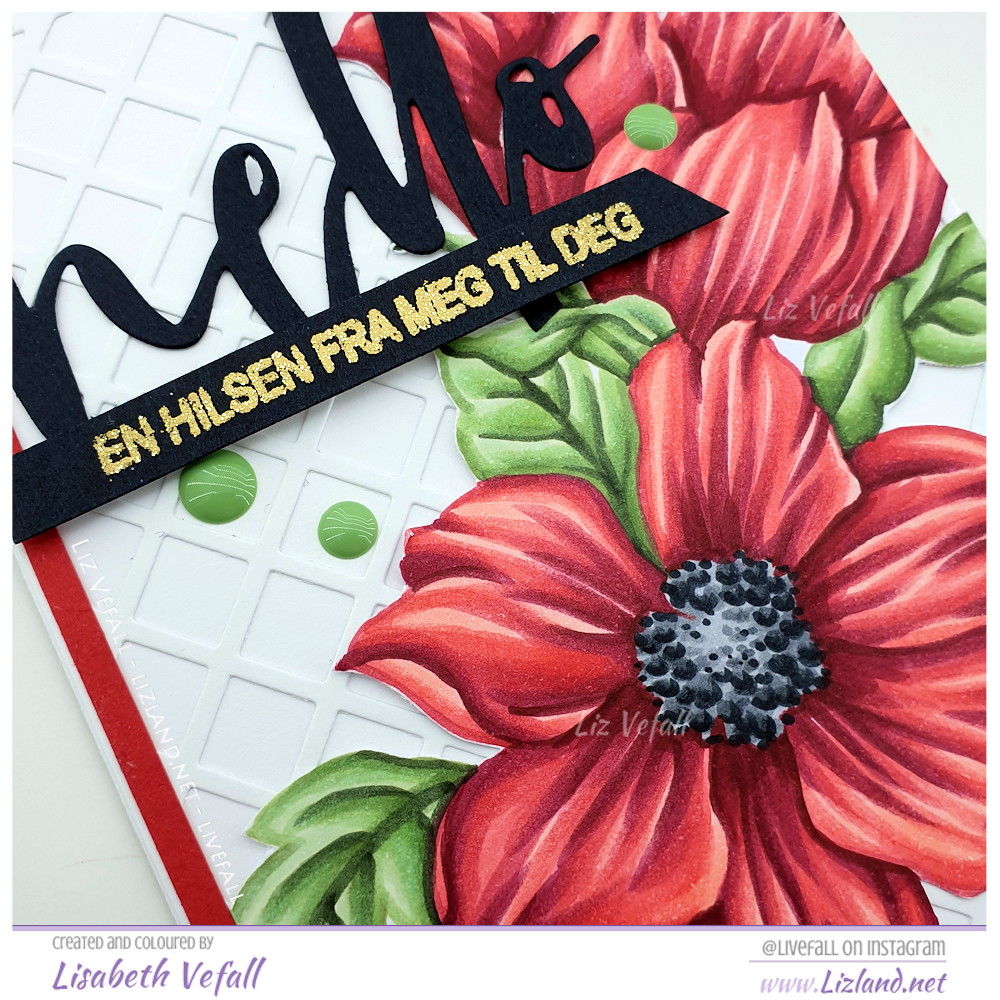
Let’s have a proper close-up as well for a change.

Copics used: R32, R35, R37, R39, R89, N3, N5, N7, N9, G40, YG61, G82, G94, BG99

You deserve this

The great thing about stamps is that you can use them in lots of different ways. The previous time I used this stamp, which is a flower stamp by InkOn3, on a card I stamped it once, in no-lines and then I cut it out for the card I made (you can see that card here). This time I’ve stamped it twice, at different angles, with black ink. I’ve coloured it up using Copic Marker and placed it on green cardstock. I used text stamps from Mathia Design (Hobbykunst) where I stamped the bigger text directly onto the coloured panel and the other text was stamped on black card stock and embossed in white. Three rhinestones and the card was done.